

Louise's book is incredible! I love it. When I first saw her theme as part of the Australian Art Journal Swap, I was going to paint or draw something like one of those abstract modern trees with all the curly branches, then I thought of that night / day painting I love... then the book arrived! Wow :D Scrapped all those initial thoughts because it simply had to be a page that was worthy of Louise and her beautiful book. I decided upon a flowering Red Gum. But of course they're tall and strong and huge ... this book is a wide landscape. When searching for pics of trees I came across bonsai trees, why didn't I think of that before? So a Bonsai Red Gum was grown inside the book using a few of my favourite things.


Trusting the mess is really hard. The colours weren't what I wanted, the stencils didn't look like a forest of wildflowers... but "trust the mess" we're always told. Its just a background...!
 How pretty and delicate are these die cut wildflowers (made using a set of Tim Holtz Sizzix Thinlits). They've been die cut using sets 1 and 2 of "Wildflowers" with my Cuttlebug. The flowers on the left are handmade ricepaper and the others are made of kraft cardboard.
 Layer upon layer the picture started looking like a tree with a garden. The tree was painted (planted! lol) using a mixture of watercolours and pencils. All the browns turned grey and the reds looked too red and out of place. Trust the mess... who invented that phrase anyway? How did they know to trust it when the art just doesn't look how you want it to look? Breathe... what will be will be :)
All the wildflowers were glued in place using gel medium. At least they seemed to calm down the mess. It needed to dry so gave up looking at it and went onto making the flowers and leaves.
 The gum leaves were made using Tim Holtz's adhesive backed fabrics and watercolour paper.
 This photo above shows the lightest piece of Tim's fabric before I misted it with water. Being an even weave lightweight linen fabric, it took well to the water and ink.
 Here is the string ready to be coloured. My first idea was to paint the blossoms and just attached bits of string but that soon changed to having more string and less card!
 To colour the string, I used Derwent Inktense art sticks. I used three different reds and then sprayed it with water and squished it around. I did this a few times until the string was totally soaked in red ink. I guess using a dye bath would have been better, or I could have soaked the string using Distress Stains but I just wanted to use my art sticks! They're so cool :)
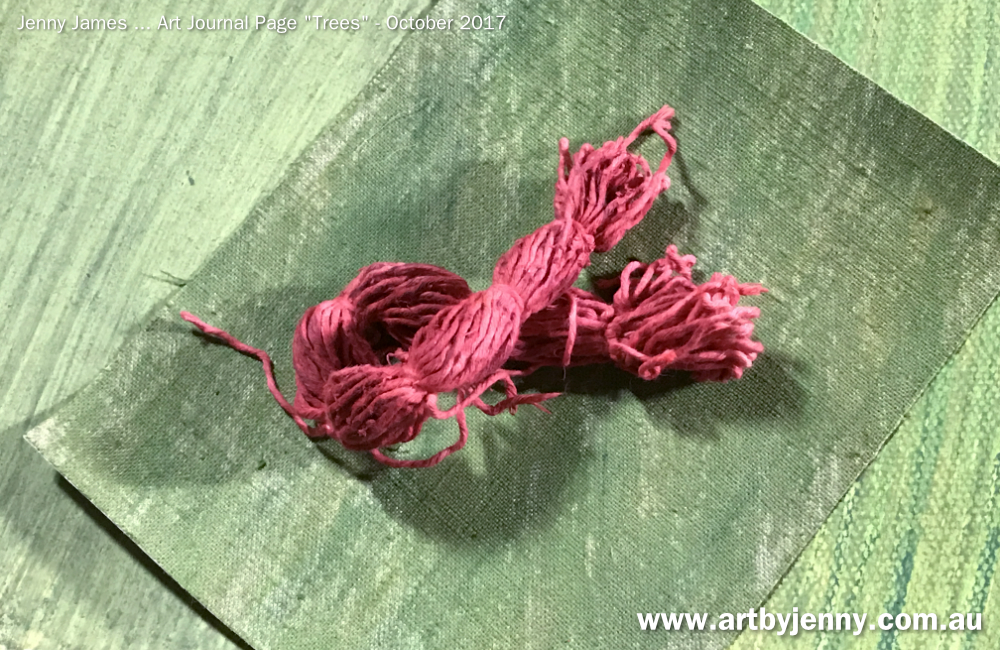
 I love string! Dying the string with the Inktense art sticks coloured the card at the same time. I had such a lovely time :)
 Love the red in this photo! Such a beautiful colour, one of my favourites :) This photo is only here because of that! lol :) Gotta love colour!
 Almost dry... string, card and fabric ready to get turned into flowering red gum blossoms.
 Luckily it was windy when I hung out the string to dry so I was able to make the flowers the next day (instead of waiting till later). So grateful for my Tim Snips because their micro-serated blades cut the string bulk alot easier than my other craft scissors.
 A bit of yellow Enamel Accents (3D paint) was spotted delicately on the printouts and smooshed everywhere on the ends of the string flowers.

 Pegs are the best invention!
 This is a closeup of the leaves and gum blossoms. The veins were drawn with red pencil. It always amazes me how things change after they've dried and been put together! So pleased with how these flowers have turned out :)
 These adorable little birds and leaves were made by my Dad (handcut between pieces of craftwood on his scrollsaw).
 I used watercolours to paint the birds... it soaked in a bit but once they dried, they looked fine. These are a new species of bird - a spoggiestar! Spoggy is sparrow, star from starling... not that they need to be real birds, its only art :)
A few Clippings Stickers by Tim Holtz (hundreds to choose from in every pack) were added to the page near the birds. I love the sayings Tim's found and collated together for his sticker packs and washi tape. I have a computer and printer with the whole internet filled with quotes and clever sayings, plus hundreds of books! But there's something awesome about stickers and I don't know what it is, I simply love stickers :)

So here it is, a bonsai flowering river red gum (eucalyptus camaldulensis). Thanks to Louise for such a wonderful theme. I loved making this page :) xx Jenny


All the wildflowers were glued in place using gel medium. At least they seemed to calm down the mess. It needed to dry so gave up looking at it and went onto making the flowers and leaves.


All the gum leaves were handcut ("fussy" cut... not that I was too fussy!). Some are a better shape than others, but I do love how the colours have behaved and dried the proper gum leaf green.


A few Clippings Stickers by Tim Holtz (hundreds to choose from in every pack) were added to the page near the birds. I love the sayings Tim's found and collated together for his sticker packs and washi tape. I have a computer and printer with the whole internet filled with quotes and clever sayings, plus hundreds of books! But there's something awesome about stickers and I don't know what it is, I simply love stickers :)

So here it is, a bonsai flowering river red gum (eucalyptus camaldulensis). Thanks to Louise for such a wonderful theme. I loved making this page :) xx Jenny
Edit ... 30 April 2022 - You may have seen this page before as I created it in October 2017 and published the tutorial originally in November 2017 at the Australian Journal Swap Blog. I've updated a bit of the wording to reflect changes in product names and availability (treasures retire to make way for new fresh ideas and products). This page still makes me smile, hope it makes you smile too and inspires you to create something arty crafty today!