Showing posts with label Darkroom Door. Show all posts

Saturday, February 15, 2020

Summer TeaTime Collage Fun

Life is like a cup of tea... to be filled to the brim and enjoyed with friends.

Time for Tea conjures up all kinds of ideas... but eventually I nailed one down and started making Sharon a pot of daisy tea. The Tim Holtz Paper Dolls dropped by to help :)

I've made it with quite a few layers, not always happy with each one but it eventually turned out ok. Bright, colourful, full of sweet elements.
First thing I did was take the pages out of the ring binder and glue down some pretty doilies with a gel matte medium.

I then dragged the pages through puddles of Distress Oxide Ink (Squeezed Lemonade and Iced Spruce) on a craft mat but it seemed to stick to the paper rather than spread out. Nice colours but not quite the marbled background I envisioned.
Moving on, I sprayed both Distress Ink Stain (Twisted Citron, a gorgeous lime green) and Distress Oxide Sprays (Mermaid Lagoon and Cracked Pistachio) to the pages and it seemed to liven it up! I finished off the background with Distress Oxide Spray in Fossilized Amber (earthy yellow).

Once the inky background was dry, I gathered a couple of my fave Tim Holtz stencils (ZigZag and Blossom) and added their patterns using Dylusions acrylic paint (Mushy Peas and Calypso Teal) and an ink blending tool (foam applicator).

The next layer was made with the Finnabair Paper Texture Paste (it dries like homemade paper) and Tim Holtz stencil (Lace), spread with a plastic spatula.

An overview of the page so far...

While deciding what to do next, I stamped out a Darkroom Door teapot (set called Time for Tea), cups, spoon and teabags with black Ranger Archival Ink on white mixed media paper. I was toying with the idea of a colourful teaset... but I think the simple black and white is best.

Now the plaster was dry, I added Ranger's Gloss Transparent Texture Paste through the Tim Holtz stencil, Flourish, letting each section dry before adding more beautiful swirls.

This photo (above) is of the texture paste drying, with spots of Nuvo Drops scattered around.

The teapot was made 3D with the help of an Action Wobble... being adhesive backed help hold the Tim Holtz Idea-Ology paper flowers and little teabag strings in place too.

I coloured the flower centres in yellow ink and drew daisies onto the teabags. I was going to use real teatags but they were too big.

The rest of the elements are butterflies, daisies and roses from a pack of Tim Holtz Idea-Ology Botanical Layers, washi tape (more butterflies!), and a pair of Tim's Idea-Ology Paper Dolls.
The silver spoon is stamped using silver watercolour paint, then coloured some more with the same paint to darken the silver paint.

The final touches are a sticky note stamped with the quote, more butterflies, dribble of honey, glitter (sugar) on the spoon and another paper lace doily along the bottom.

Its turned out to be a pretty floral Spring-like page in the end. Thanks for reading :) Hope it makes you smile!

Happy Creative Day!
:)
Jenny

Saturday, November 2, 2019

A Bucketful of Art

My Bucket List is art, art and more Art!

A bucket list isn't something I've ever really thought about until now. It turns out that dreams are just like a bucket list and I've had plenty of those... as you do! They've changed over the years but there seemed to be a reoccurring theme... Art. I guess you're not surprised :) lol

Art by Jenny mixed media journal page artwork featuring the theme Bucket List
Have an art gallery and studio, guesthouse B&B for art retreats, online and real world classroom, and little shop. Creating, sharing, teaching, inspiring, healing and helping. By the seaside, anywhere in Australia. I'm getting there, one tiny ant sized step at a time I'm managing to create a Life Less Ordinary through art, art, art and more art :) Why not!

So this is what I've created for Meg's journal that's travelling around Australia with the theme "Bucket List". A few thoughts about art. Its more like a sampler the way it got created but art doesn't have rules or must have any particular look. You can see all our other journals at the Australian Art Journal Swap Blog.

List of Treasures Used...

- Mixed Media Paper
- Dylusions Acrylic Paint
- Ranger Mini Ink Blending Tools and Foams
- Tim Holtz Tonic Studio Mini Snips
- Ranger Embossing Powder
- Darkroom Door Stencils
- Tim Holtz Layering Stencils
- Tim Holtz Foam Stamps
- Tim Holtz Collage Gel Matte Medium
- Tim Holtz Idea-Ology Transparent Wings
- Tim Holtz Idea-Ology Quote Chips
- Tim Holtz Stamps "theories"
- Ranger Archival Ink Pad, Jet Black
- Dylusions Acrylic Journaling Block
- Finnabair Paint Brushes
- Masters' Brush Cleaner
- Tim Holtz and Dylusions Stickers
- Dylusions Glue Stick
- Chipboard Letters
- An Old Paintbrush
- Wooden Sticks (for the pencils)

All available online at Art by Jenny

Start with a background...

Make sure you're using a good quality paper that withstands wet and dry visual arts techniques. You can find mixed media paper in so many brands now, but my go-to papers are still Dylusions by Dyan Reaveley journals (made by Ranger) and Strathmore's Mixed Media and Watercolour Papers (and journals and artboards)... use what you have and when you run out, try these. Yes I sell them both, but I only because I love and use it all myself :D

I've used Dylusions Acrylic Paints for all the background and overpainting... its such a beautiful smooth, quick drying paint. Perfect for journals.

creating the background for Mixed Media artwork by Jenny James featuring the theme Bucket List
Smoosh, swirl and blend Dylusions Paint in Mushy Peas and Calypso Teal over your whole surface using one of my fave little tools, the Mini Ink Blending Tool from Ranger.
The easiest way to start is to take a spot of paint from the jar (and put the lid back on straight away), and press it onto your craft mat or flat paint palette. Swirl it into your foam tool in a circular motion (it spreads it evenly through the foam). Smoosh (spread, blend, move in any direction) the paint over your page.

I've used a spirally circular pattern this time. The pattern changes with the mood, weather and paper so let the hand and foam do whatever it wants at this stage. Just enjoy the blending of colours.
The stripe down the centre is a white washi tape as I didn't want the paint going through to everyone else's pages. Sometimes this disappears under all the layers of paint and collage.

Don't forget : Add a spray of water into your jars of Dylusions Paint to put back the moisture that evaporates while you have the lid off. Even in Winter but especially in the Aussie Summer!

The ink blending foams are washable but wash them before they dry out! The end of the day is fine, it doesn't dry that fast on foams :)
The easiest way to clean foams is to use up all the paint on future backgrounds, journal pages and paper that can be used in collage (smoosh it around until its all gone), then wash the foams with soapy water (I use Master's Artist Handsoap for my hands and stencils, Master's Artist Brush Cleaner for my foams, brushes and gel printing plates).

creating the background for Mixed Media artwork by Jenny James featuring the theme Bucket List
The large Darkroom Door "Crackle" stencil above was used to add a bit of Dylusions Lemon Zest (yellow), and the Tim Holtz "Grime" (my new favourite) and "Splatters" Layering Stencils were used with the pretty Calypso Teal blue acrylic paint.

I've blended paint through all the stencils using the same foam tools, one for white, the other for everything else.

creating the background for Mixed Media artwork by Jenny James featuring the theme Bucket List
When using stencils, its up to you which part of it you wish to use... the whole design, part of it, upside down, back to front. If you want to add more, add more. Want to leave it simpler, go for it - its art, there are no rules or mistakes :)

an overview of the background for Mixed Media artwork by Jenny James featuring the theme Bucket List
The above photo is an overview of what was starting to look like a pond or river. Initially I thought I might make a bucket list on kites, clouds or lily pads - none of which happened but I really love these colours!

Add more layers...

more stenciled layers on the background for Mixed Media artwork by Jenny James featuring the theme Bucket List
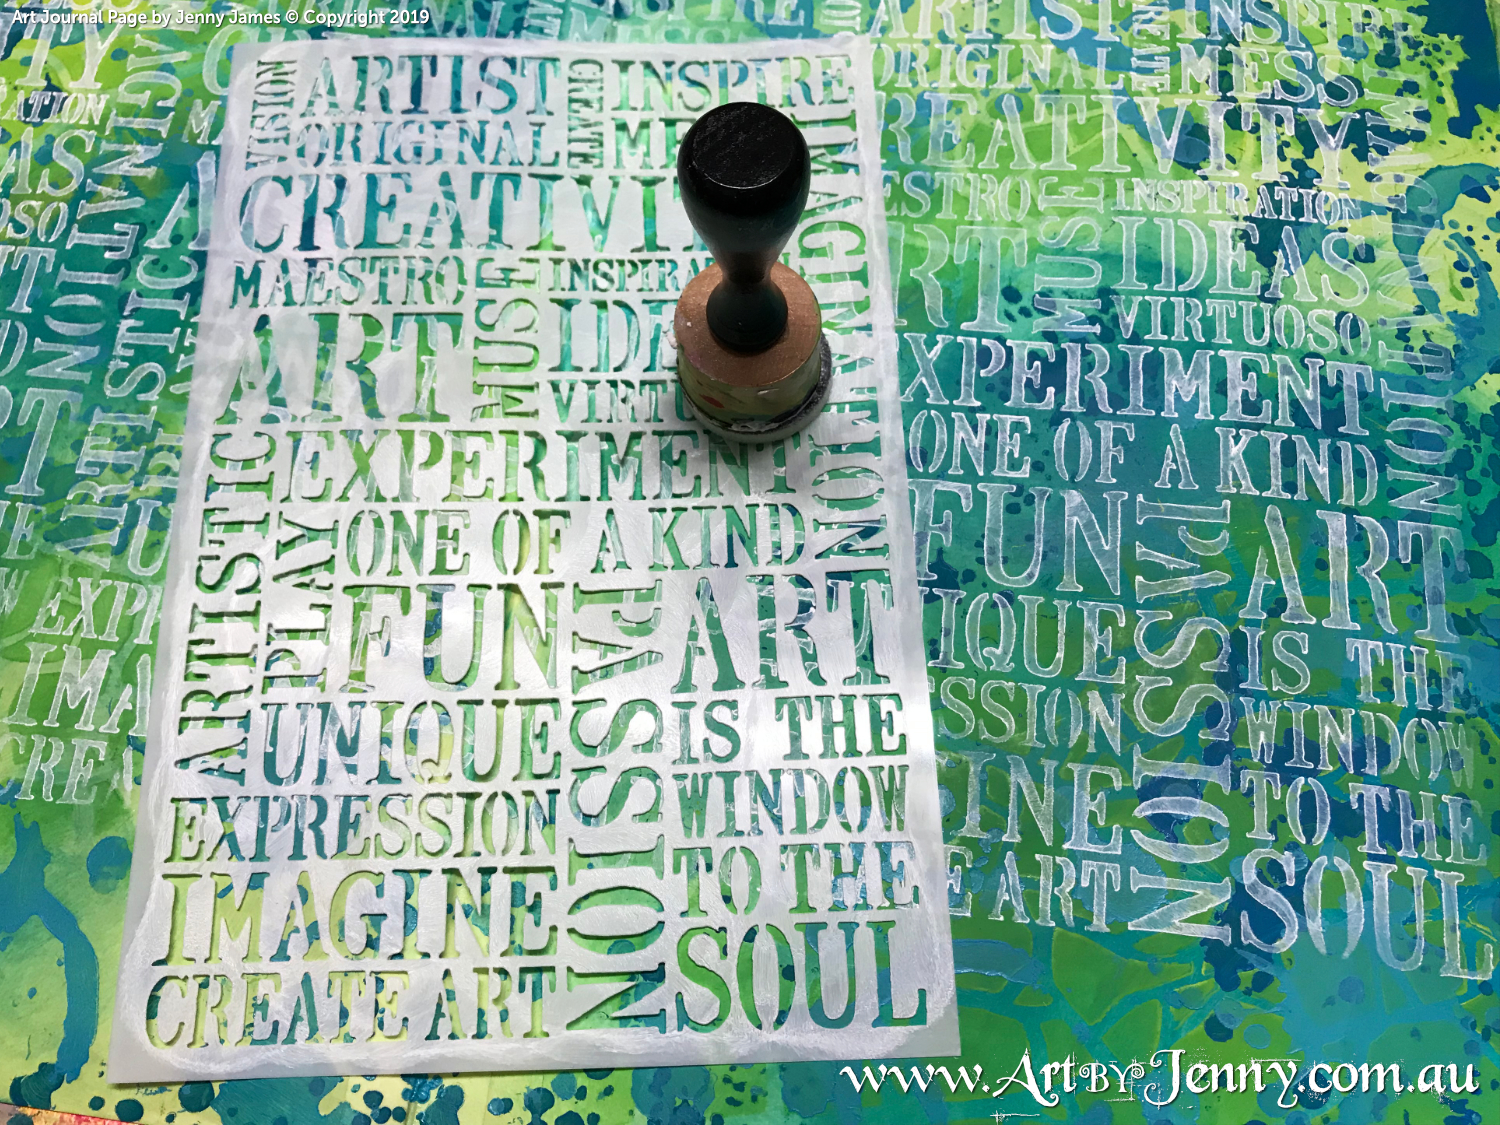
Once all the background base has dried, add a layer of Dylusions White Linen Acrylic Paint using your favourite words stencil. I've used Darkroom Door medium sized stencil called "Creativity".

painting in featured areas for Mixed Media artwork by Jenny James featuring the theme Bucket List
Once this was dry, I added Maisie, a Dylusions by Dyan Reaveley stencil and mask set (this one's the middle child), also using Dylusions White Linen Paint. Then using a paint brush, I add extra white to create definition in her hair, skirt and boots.

Art is the Window to the Soul, view of the art journal page through the stencil
Above : Art is the window to the soul ... I saw this as I lifted off the Maisie Stencil after painting her basic shape - so of course it had to be photographed :) The border or rather, window, is the actual stencil of her head. Seemed perfect at the time! lol :)

Making Pencils...

art journal page wip showing how to make pencils with collage by Jenny James
In the past I've used skewers and tooth picks to make pretend pencils and paint brushes. Usually I'd colour them with markers, paint or pencils, then for the brushes, squishing the ends with pliers to make into faux bristles.

This time I've used skinny flat sticks (wood spatulas or thin iceblock sticks) and cut to shape using Tim's strong Mini Snips (micro serrated 5" scissors).
I added a bit of colour with the Distress Crayons, then blended the waxy colour into the wood using my finger (no water).
I wanted shiny 3D pencils, so gave each a coating of Ranger's Glossy Accents then left them to dry somewhere flat and level.

Of course the second I put them down, I forgot they were on my book and put something down on top of them! whoops. Didn't matter, they still dried shiny :)

Once completely dry (ie, the next day in case I dented them again), I glued my new pencils and vintage paint brush using gel matte medium. They needed a hand to stay put, so I held them in place with pots of paint.
Had to leave that for a while cos each time I tried to do something else, I moved the brush.

Heat Embossing with Mixed Media...

I much prefer using embossing powders for abstract art and creating raised layers. Its certainly much easier than how they're used in cardmaking and scrapbooking. Plus, if you get spatters, it doesn't matter!

Embossing the Alphabet :
1 ... Apply some embossing ink, glue, paint or gel medium to your die cut shape (I smoothed out the squiggles with my finger but for something different, they could be left as they landed).

heat embossing elements for the Mixed Media artwork by Jenny James featuring the theme Bucket List
Ranger have a fantastic ink called "Emboss-It" Embossing Ink and its available not only as an inkpad, reinker and set of pens but also as a dabber bottle! Perfect for mixed media and abstract artwork :)

If using glue or gel medium, the powder does seem to melt better if left to dry but its not absolutely necessary.
heat embossing elements for the Mixed Media artwork by Jenny James featuring the theme Bucket List
2 ... Fold a sheet of dry paper in half and unfold, pour on some embossing powder. At the end, the crease in the paper helps guide the excess back into the jar.

heat embossing elements for the Mixed Media artwork by Jenny James featuring the theme Bucket List
3 ... Dip your sticky shape into the powder. I jostled it around a tiny bit and lifted and patted it into the powder, making sure a really thick amount was stuck.

4 ... Pour the excess powder back in its jar and repeat the process with the next colour.

heat embossing elements for the Mixed Media artwork by Jenny James featuring the theme Bucket List
5 ... Once you've got all your letters / shapes dry and ready to melt gather them onto a heat-proof surface. Using your heat tool (also called a hot air gun - not a hair dryer, its too blowy and not hot enough), gently hover over the powdered piece until the colours melt and blend. Be careful, it gets really really hot!

... slightly off topic : Did you know that next year, 2020, is the Year of the Rat? Australia Post's stamps and coins featuring native Aussie mice as well as rats are so adorable!

heat embossing elements for the Mixed Media artwork by Jenny James featuring the theme Bucket List
Careful not to get the hot air too close or stay in one spot too long as it might scorch the paper - but then, charcoal is a nice colour too!
You will need to use something like long tweezers or pliers to hold the piece as you're heating it, so you don't burn your fingers. Let everything go cool before handling!

Embossing Maisie's Boots :
Maisie's boots were created in the same way as the alphabet with only a slight difference.
I painted the gel medium directly to the page and poured on some of Ranger's Speckles Embossing Powder, pink for the boots, yellow for the trim - at the same time.

I then lifted the page to gently shake the excess powder back onto the folded sheet of paper and put back in the pink jar (there wasn't much yellow so all went back in the same jar).

When cardmaking, it helps to warm the paper from underneath to get an even coverage and help stop the heat tool from blowing around the powder over the rest of the surface.

heat embossing boots for the Mixed Media artwork by Jenny James featuring the theme Bucket List
This is how I heated Maisie's boots... firstly from underneath then over the top, waving in a way that any stray powders would be blown onto the boot and not all over the page.

painting the scenery for the Mixed Media artwork by Jenny James featuring the theme Bucket List
I always get splatters of embossing when working directly onto a surface anyway but with mixed media, its easily fixed. I painted over the unwanted spots using Dylusions paint in Mushy Peas and Dirty Martini (both are beautiful greens) to create a carpet of green ground.

Additional Elements...

adding other elements Mixed Media artwork by Jenny James featuring the theme Bucket List
While the ground was drying I added some words of wisdom around the page and one of Tim's Idea-Ology Transparent Wings (a gorgeous butterfly) in Maisie's hair.

All the sayings were stamped onto plain paper using Tim Holtz rubber stamps "Theories" and Jet Black Ranger Archival Ink Pad. The words "to do" and "important" are stickers from Dylusions Dyary collection and the "Create Art" banner is a Tim Holtz Idea-Ology Quote Chip embellishment. All glued in place using Dylusions Glue Stick and for the butterfly, double sided clear tape.

adding other elements Mixed Media artwork by Jenny James featuring the theme Bucket List
The flowers are hand painted with a paintbrush after using Tim's Idea-Ology Foam Stamps "Funky Flora" to create a guide. Using stamps to for the initial placement of flowers helps me stop overthinking where I want them to grow.
All the spots and dots and splatters are from the ends of my brushes and tools being dipped into paint. I've used Dylusions White Linen, Lemon Zest and Pure Sunshine.

finished mixed media artwork by Jenny James featuring stencilling, heat embossing, painting and collage.
I forgot to mention all the words "art" - some are stickers, some are painted with white paint, some are stamped with Tim's foam alphabet stamps (and paint), and the arrow is a Dylusions sticker too.
Add whatever words you want to say and make it your own.

I'm always around if you need a hand or have questions! Enjoy every creative moment.

Have a happy creative day!
:)
Jenny

Wednesday, June 26, 2019

Book Art Journal Page - Underwater Library

artwork by Jenny James featuring Book Art with an Under the Sea Fairy StoryThis art journal page was created for the theme "Book Art". The artwork seemed to have a mind of its own at times, but like all good stories, had a happy ending.

My underwater world featuring adorable crabs, narwhals and bubbles of text was created using Tim Holtz Collage Paper, vintage book pages, Distress Inks and Paints, matte gel medium, Spray Inks, string, Finnabair stickers and a variety of stamps by Tim Holtz, Dylusions, Jane Davenport and Darkroom Door.

In the Beginning...

Choose 2 contrasting blue paints (I used Tim Holtz Distress Paint in Peacock Feathers and Tumbled Glass). Drip small amounts of both colours onto the surface. You don't need much if its a fluid paint.

artwork by Jenny James featuring Book Art with an Under the Sea Fairy Story
Using a seasponge press lightly everywhere all over the page, covering the whole surface but at the same time, leaving speckles of white areas here and there.

If you don't have a seasponge or a coarse sponge, scrunch up a dry piece of paper towel (kitchen paper) so it has a rough, random appearance.

artwork by Jenny James featuring Book Art with an Under the Sea Fairy Story
Next, spray or splatter the surface with Dylusions Ink Spray in both Lemon Zest and White Linen.
Mist with water to blend (it breaks up the blues) and then spray or splatter Dylusions Ink Spray in London Blue.

Lightly press paper towel over the whole page to reduce any puddles of excess ink. Some puddles you might want to leave as they'll dry eventually. Our paper towel has wavy lines embossed, so any marks left behind would look like waves.
Alternatively, select another sheet of paper and press over the whole surface - this gives you a second background to use another day.

Sprials shown in the photo above are created using a thick black foam stamp with light blue Distress Paint (Tumbled Glass). In hindsight, white would have looked better as the blue appeared to blend into the background (it was too similar).

Leave to dry for a few hours or a few days... time depends on availability and how much paint / ink was used! While waiting, create all the scenery and characters.

Creating Characters...

I'm not fond of ripping up books, even ones I don't like so I'm grateful to have been given a few pages as part of a swap. Stamping out text, script and sheet music with an Archival Ink beforehand would give the same effect.

artwork by Jenny James featuring Book Art with an Under the Sea Fairy Story
Using a blue coloured pencil, I drew dozens of scribbly circles (bubbles) and a daisy (which was turned into more circles). Use a regular, non-soluble pencil so it won't disappear if it gets wet.
Each circle was cut out by hand with scissors. Use up the page by drawing more circles and cutting them out. All leftovers were kept to one side (they get turned into rocks and seaweed).

artwork by Jenny James featuring Book Art with an Under the Sea Fairy Story
I don't have a before and after photo of the stamped narwhals, crab and books ... but this is how they were made :
- Stamp the narwhals and crab in black Archival ink onto readymade pages or stamped paper.
- Stamp the Open Book and pile of books in brown Archival ink.
- Cut out the animals using fine pointed scissors and dust all edges with Distress Ink (Walnut Stain, dark brown).
- Blend grey Distress Ink (Pumice Stone) over the abdomen of the Narwhals (making sure to leave their fins clean).
- Blend Distress Ink over the page sides and spines of both book images using a warm brown and very dark brown Distress Ink (Vintage Photo and Ground Espresso).
- Splatter lightly with water, then once dry, blend Black Soot roughly around the same areas to give a mottled, rugged look.
- To give a vintage look to the pages, lightly blend over brown and grey ink before gluing in place.
- Once the books are dry, give them another blending of ink to deepen the colours.

Set all elements aside while finishing the background. Don't throw any bits out just yet!

FYI, the stamps I used were ... "Narwhal" by Jane Davenport, little crab from "Under the Sea" by Dyan Reaveley, both books are from Darkroom Door (Bookworm stamp set and Open Book frame stamp).

The Background...

The background should be dry by now. To make it more like an ocean, print with various stamps using a mid green Archival Ink Pad (for the illusion of undergrowth and seaweed).

artwork by Jenny James featuring Book Art with an Under the Sea Fairy Story
The writing you can see scattered across the page is the background image from the Tim Holtz Entomology Stamp Set (the gorgeous insects collection).
The halftone dots across the base of the page is from Tim's Psychedelic Grunge Stamp Set (one of my faves, it has such groovy textures).

artwork by Jenny James featuring Book Art with an Under the Sea Fairy Story
Using a gel matte medium, I glued down torn pieces of Tim Holtz collage tissue "Melange", a beautiful design, full of butterflies, moths and music.
You don't have to worry too much with any of Tim's collage tissue papers, when glued down in this way the design remains the focus while the opaque paper seems to disappear into the background.

To make rocks and seaweed, fussy cut and tear the leftovers you put aside earlier into strips and odd shapes.
Glue down using the gel matte mediums and then add the crab, books, narwhals and bubbles to the page.

Thankfully the gel medium takes a little while to dry so you have time to move elements around until they're where you want them. Don't forget though, that tissue and vintage paper is fragile when wet!

Leave to dry, overnight if you can... with so much glue and paint, it might take a while! At this point in my page, I wasn't fond of the colours... but thankfully once dry, it was more olde worlde than grey grunge!

Adding Details and Other Elements...

Using Walnut Stain Distress Ink or dark brown watercolour paint, add shadows to the crab, rocks and seaweed with a paintbrush.

artwork by Jenny James featuring Book Art with an Under the Sea Fairy Story
The quote on the right hand side are from stickers by Finnabair (Sentiments Sticker Book) and says "Give a Voice to Your Story".

artwork by Jenny James featuring Book Art with an Under the Sea Fairy Story
Add Ranger's Glossy Accents (a 3D shiny varnish) to edges of most of the books (not all) and other areas to give the impression that they're all wet.

For a mini bookmark, add a tiny paperclip from Tim Holtz's Idea-Ology collection tied with a Distress Ink stained piece of muslin.

artwork by Jenny James featuring Book Art with an Under the Sea Fairy Story
The narwhals had a pretty glitter glue on their horns then a splash of Glossy over the top.
The crab was given shiny eyes and had his book dunked in "water" aka Glossy while all the bubbles were coated with Ranger's Gloss Texture Paste.

artwork by Jenny James featuring Book Art with an Under the Sea Fairy Story
The above photo shows the whole page so far... just when I thought it was finished. But then I had a delivery in the shop of a whole new collection of arty treasures... Tim's groovy Idea-Ology Baseboard Dolls and the gorgeous Transparent Wings! The page didn't feel finished anyway! lol :)

Finishing Off...

I simply had to use the Wings and Baseboard Dolls somehow, so chose the one seated and gave her wings so she could fly!

To make the ocean coloured string, I started with a yellow one and stained it using Peacock Feathers Distress Ink Pad. Tap the ink pad onto the craft mat. Loop the string into a curl and smoosh into the ink on the mat, then spray with water. Move the string around in the puddle of watery ink. Wipe up the excess ink or the string will be too soggy.

Add a 20 cent piece sized puddle of gel matte medium to the craft mat and mix in the string until it is coated with the glue.

While the glue (gel matte medium) is still wet, curl the string around and around on the page to represent waves in the sea.
Being a matte medium, it will dry clear and blend into the background. If you used other kinds of glue, they may remain visible even after they're dry.

artwork by Jenny James featuring Book Art with an Under the Sea Fairy Story
Dolly's Transparent Wings were coated with iridescent glitter glue underneath so the veins of the wings weren't covered. Her dress has splashes of Glossy Accents (it got everywhere).

How not to add Dolly : I glued the doll down with gel matte medium... then lifted her to add the wings, then lifted her again to add the glitter glue to the wings... then once more to add the ends of string underneath. I don't recommend this "technique" but luckily she's a tough dolly and didn't hurt her a bit!

Its a better idea to apply glitter glue to the wings and let it dry before adding the wings onto the doll or the page.
When staining Paper Dolls or Baseboard Dolls, decide on a colour before starting because it doesn't come off again!

artwork by Jenny James featuring Book Art with an Under the Sea Fairy Story
So here it is... my finished art journal page. Click the image to view bigger. I always find it interesting to see how the artwork changes with every layer and element added.
For me, this is a little friendly crab telling stories and sharing books with his fairy and narwhal friends while hanging out in an underwater library. Maybe its a poetry reading!

Thanks so much for visiting and checking out my journal page. I hope it makes you smile too!

Have a wonderful, happy creative day!
:)
Jenny

Thursday, July 12, 2018

Butterfly Flower Garden Art Journal Page

Butterflies are incredible creatures that are in thousands of different shapes, sizes and colours... such variation - some wander for thousands and thousands of kms, others stay close to home, some live such short lives. All are extroardinary and beautiful.

butterflies art journal page using stencils and mixed media craft supplies
The above photo is a closeup my art journal page covered in beautiful flying creatures made from Tim Holtz Stamps, Framelits, Bigz Die and Embossing Folder. The theme was "Exotic" and is part of the Australian Art Journal Swap (click here to visit the AAJS blog).
I've also used Dylusions paints, Jane Davenport Mermaid Markers and Tim Holtz Foam Stamps to create a magical garden for these exotic beauties.

Here's a quick reference list of treasures used...
... Pines, Scribbles, Leafy, Feathers, Flourish
... Fern, Blossom
- Cuttlebug Die Cutting Machine (or use a Big Shot, Vagabond or other die cutting machine - so many to choose from. Jane's even getting one under her brand too, she's working with Spellbinders to make a pretty blue one covered in mermaids!)
If you need a hand finding anything or would like to order something, sing out anytime :)

The Background

background of the butterflies art journal page using stencils and mixed media craft supplies
The background was created layer upon layer, using acrylic paints with stencils and foam stamps.
The first layer (above) was simply Lemon Zest and Dirty Martini, smooshed all over the page then left to dry as I sifted through my stencils.

background of the butterflies art journal page using stencils and mixed media craft supplies
Using the foam blending tool, I blended the Tim Holtz Leafy and Feather stencils using just the Dirty Martini paint.

background of the butterflies art journal page using stencils and mixed media craft supplies
This pic of my paint covered stencils is just to show you what the stencils look like :) Thought it might be useful considering I don't seem to have any action photos showing them in use!

background of the butterflies art journal page using stencils and mixed media craft supplies
For the next layer, I've used the large Darkroom Door Fern and Blossom stencils and then the Tim Holtz Pines, Scribbles and Flourish stencils with Polished Jade (the darker green), Dirty Martini and Lemon Zest. The Blossom was blended with a mix of Polished Jade and Lemon Zest.

background of the butterflies art journal page using stencils and mixed media craft supplies
Using the Vibrant Turquoise paint and Cut Out (Funky) Floral Foam Stamps by Tim, I printed the foreground foliage.


background of the butterflies art journal page using stencils and mixed media craft supplies
The above shows the background before I added all the flowers. I was on a roll, mixing the greens, blending the yellows, "growing" the garden! So much that my coffee went cold... as it often does :) lol Gotta love my mug though! My son gave it to me :D Its beautiful.

background of the butterflies art journal page using stencils and mixed media craft supplies
Above: As you can see, I add the paint to the foam stamp using the foam ink blending tool, collecting paint from the lid. This gives the foam stamp an even coverage of paint. If you dip into the paint you may get lumps of paint where you don't want them!

When leaving your pot (or jar) of paint open for a while, make sure you add a spray of water before closing again - this will ensure your paint stays beautifully fluid to the last drop.

background of the butterflies art journal page using stencils and mixed media craft supplies
To paint the flowers I used Lemon Zest and Pure Sunshine... the fab thing about foam stamps (apart from their cool shapes and not having to cut apart potatoes!) is that you can see exactly where to overlay the image when printing with multiple colours.

background of the butterflies art journal page using stencils and mixed media craft supplies
To add white tips to the petals, simply add paint only to the tips of the petals on the foam stamp then press over the flower on the page.

background of the butterflies art journal page using stencils and mixed media craft supplies
Centres of the flowers were added using the groovy little Detail Blending Tool. This is a useful little stick with foam circles on both ends. Luckily it is in a pack of 5 so I don't have to wash off the paint. Now I have a stick for yellow and white, and 4 others for another day :)

background of the butterflies art journal page using stencils and mixed media craft supplies
Above: photo showing the finished garden on the right hand side of the journal page.

background of the butterflies art journal page using stencils and mixed media craft supplies
Above: photo showing the finished garden on the left hand side of the journal page.

The Butterflies

butterflies art journal page using stamps and other mixed media craft supplies
The two giant butterflies were coloured using Jane's Mermaid Markers (Pirate's Gold with Starfish; Lagoon with Bali Blue and Byron Bay) and left them to blend naturally as they dried.


butterflies art journal page using stamps and other mixed media craft supplies
They were both cut out with the Tim Holtz Butterfly Duo Bigz Die using my Cuttlebug. Then they were rolled through again using the matching texture fades embossing folder to give them the raised pattern.


butterflies art journal page using stamps and other mixed media craft supplies
A splash of contrast was added using Black Soot Distress Ink and an ink blending tool. The abdomen was coloured with the dark brown Reef Mermaid Marker.


butterflies art journal page using stamps and other mixed media craft supplies
The butterflies were given a splash of shimmer using Winsor & Newton Iridescent Medium.

butterflies art journal page using stamps and other mixed media craft supplies
I love how the colours blend and how the medium adds life! I should mention that the paper I've used for all butterflies is Strathmore Mixed Media Paper. In case you were wondering :)

butterflies art journal page using stamps and other mixed media craft supplies
All butterflies need antennae to feel their way and chat together... sadly the Bigz die cuts them off but they're easier enough to add back. Sometimes I'll use twine or string but this time I've used Tim's cotton thread and bit of double sided tape.
As you can see above, I use one piece of cotton and bend it under the tape.

butterflies art journal page using stamps and other mixed media craft supplies
All the small butterflies were created using Tim's Flutter By stamps and matching Sizzix Framelits.
To make them, I stamped them all using an Archival black ink pad. I was going to use colourful inks, but our encyclopaedia shows nearly all butterflies have either black, white or brown outlines.

butterflies art journal page using stamps and other mixed media craft supplies
In the photo above, I've shown you what the difference inking edges and bodies makes. Left is before I've added Stormy Seas Mermaid Marker to the body/abdomen and Black Soot Distress Ink to the edges. Its only a subtle difference, but it hides the white paper they're made from and helps lifts them from the page :)

butterflies art journal page using stamps and other mixed media craft supplies
One by one, their antennae was added back (after being cleanly cut off using the Sidekick and Framelits) using the thick cotton thread and double sided tape.

One day Sizzix will make dies for butterflies and dragonflies with all their anatomy in tact. Maybe even embossing and cutting at the same time. Have you seen the Impresslits yet? Very clever!

butterflies art journal page using stamps and other mixed media craft supplies
A quick closeup of all the butterflies waiting together for the next step.

butterflies art journal page using stamps and other mixed media craft supplies
After adding antennae, inking all the edges and painting the bodies, I added a splash of shimmer using Wink of Stella... black for the bodies and clear for the wings.

Finishing the Art Journal Page

butterflies art journal page using stamps and other mixed media craft supplies
Closeup pic of one of my faves... who am I kidding, all the butterflies are my faves. Even the red ones after I added white spots and more glittery shimmery stuff.


butterflies art journal page using stamps and other mixed media craft supplies
Placing elements on a page to make it appear like it was random isn't as easy as it seems... I started by letting them fall wherever they wanted but it was a tad lopsided.

butterflies art journal page using stamps and other mixed media craft supplies
In the end, after about an hour! lol, I placed the big butterflies on the right hand side - flying into the page together, while the little ones flew around them.
All butterflies were glued down with the double sided tape. I didn't add more, I used the same piece that held on the antennae, allowing all their wings to be free to fly.

I then added thoughtful words and sayings like 'go with your heart', 'can never have too much happy' and 'adventure awaits' using Tim's stickers and washi tape.

Above shows the completed left hand side of the spread and below shows the right hand side.

butterflies art journal page using stamps and other mixed media craft supplies

So there we have it. A completed flock of flutterbies and butterflies, almost as beautiful as what Mother Nature creates :) I love moths, caterpillars and dragonflies too! They're all incredible!

Thanks for reading my blog :) Hope these butterflies made you smile and inspired you to paint, colour and create!

Happy Creative Day!
:)
Jenny

All treasures available from my online shop at www.shop.artbyjenny.com.au :)