Showing posts with label art n craft swaps. Show all posts

Saturday, April 30, 2022

Art Journal Page - Bonsai Flowering River Red Gum

This art journal page was dreamed up and created in 2017 as part of an art journal swap around Australia. Its been updated to reflect product changes (as some have retired) with new thoughts and better way of saying things so its easier to understand. I took alot of photos along the way too - only 152! lol :) I still take dozens sometimes hundreds of photos while creating! Its handy sometimes to have a reminder of how something was made! Hope it makes you smile :) Enjoy!

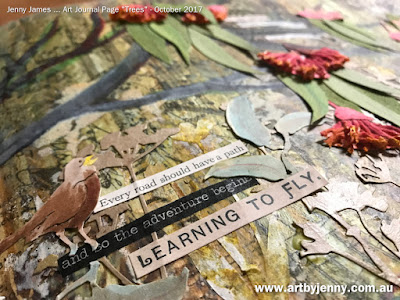
Learning to Fly ... art journal page by Jenny James using stickers from Tim Holtz

How to Grow a Flowering River Red Gum in a Book

Louise's book is incredible! I love it. When I first saw her theme as part of the Australian Art Journal Swap, I was going to paint or draw something like one of those abstract modern trees with all the curly branches, then I thought of that night / day painting I love... then the book arrived! Wow :D Scrapped all those initial thoughts because it simply had to be a page that was worthy of Louise and her beautiful book. I decided upon a flowering Red Gum. But of course they're tall and strong and huge ... this book is a wide landscape. When searching for pics of trees I came across bonsai trees, why didn't I think of that before? So a Bonsai Red Gum was grown inside the book using a few of my favourite things.

I love stencils :) There are literally thousands of them out there plus the blank sheets of plastic (packaging, paper, card, scraps ... anything can be a stencil or mask). I seem to have collected a few over the years! lol For this page I've used stencils by Tim Holtz and Darkroom Door's Wildflower (small clean one on the right, its not clean anymore).

The page started out being a whole background of Tim Holtz Collage Tissue (Melange, retired). It was covered with music and butterflies, you could also use one called "Entomology" which is beautiful or use birds from the roll of "Aviary" Collage Tissue. 
Trusting the mess is really hard. The colours weren't what I wanted, the stencils didn't look like a forest of wildflowers... but "trust the mess" we're always told. Its just a background...!

How pretty and delicate are these die cut wildflowers (made using a set of Tim Holtz Sizzix Thinlits). They've been die cut using sets 1 and 2 of "Wildflowers" with my Cuttlebug. The flowers on the left are handmade ricepaper and the others are made of kraft cardboard.

Layer upon layer the picture started looking like a tree with a garden. The tree was painted (planted! lol) using a mixture of watercolours and pencils. All the browns turned grey and the reds looked too red and out of place. Trust the mess... who invented that phrase anyway? How did they know to trust it when the art just doesn't look how you want it to look? Breathe... what will be will be :)

All the wildflowers were glued in place using gel medium. At least they seemed to calm down the mess. It needed to dry so gave up looking at it and went onto making the flowers and leaves.

The gum leaves were made using Tim Holtz's adhesive backed fabrics and watercolour paper.

This photo above shows the lightest piece of Tim's fabric before I misted it with water. Being an even weave lightweight linen fabric, it took well to the water and ink.

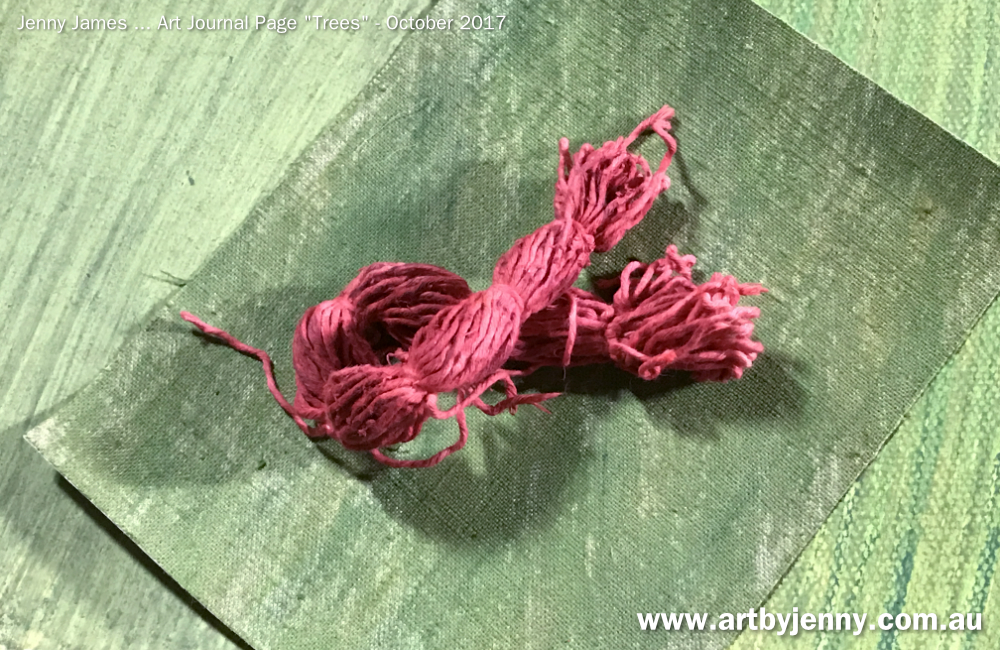
Here is the string ready to be coloured. My first idea was to paint the blossoms and just attached bits of string but that soon changed to having more string and less card!

To colour the string, I used Derwent Inktense art sticks. I used three different reds and then sprayed it with water and squished it around. I did this a few times until the string was totally soaked in red ink. I guess using a dye bath would have been better, or I could have soaked the string using Distress Stains but I just wanted to use my art sticks! They're so cool :)

I love string! Dying the string with the Inktense art sticks coloured the card at the same time. I had such a lovely time :)

Love the red in this photo! Such a beautiful colour, one of my favourites :) This photo is only here because of that! lol :) Gotta love colour!

Almost dry... string, card and fabric ready to get turned into flowering red gum blossoms.

Luckily it was windy when I hung out the string to dry so I was able to make the flowers the next day (instead of waiting till later). So grateful for my Tim Snips because their micro-serated blades cut the string bulk alot easier than my other craft scissors.

A bit of yellow Enamel Accents (3D paint) was spotted delicately on the printouts and smooshed everywhere on the ends of the string flowers.

All the gum leaves were handcut ("fussy" cut... not that I was too fussy!). Some are a better shape than others, but I do love how the colours have behaved and dried the proper gum leaf green.

Pegs are the best invention!

This is a closeup of the leaves and gum blossoms. The veins were drawn with red pencil. It always amazes me how things change after they've dried and been put together! So pleased with how these flowers have turned out :)

These adorable little birds and leaves were made by my Dad (handcut between pieces of craftwood on his scrollsaw).

I used watercolours to paint the birds... it soaked in a bit but once they dried, they looked fine. These are a new species of bird - a spoggiestar! Spoggy is sparrow, star from starling... not that they need to be real birds, its only art :)

Learning to Fly ... art journal page by Jenny James using stickers from Tim Holtz

A few Clippings Stickers by Tim Holtz (hundreds to choose from in every pack) were added to the page near the birds. I love the sayings Tim's found and collated together for his sticker packs and washi tape. I have a computer and printer with the whole internet filled with quotes and clever sayings, plus hundreds of books! But there's something awesome about stickers and I don't know what it is, I simply love stickers :)

finished page using many textiles, inks and paints

So here it is, a bonsai flowering river red gum (eucalyptus camaldulensis). Thanks to Louise for such a wonderful theme. I loved making this page :) xx Jenny

Edit ... 30 April 2022 - You may have seen this page before as I created it in October 2017 and published the tutorial originally in November 2017 at the Australian Journal Swap Blog. I've updated a bit of the wording to reflect changes in product names and availability (treasures retire to make way for new fresh ideas and products). This page still makes me smile, hope it makes you smile too and inspires you to create something arty crafty today!

Friday, July 31, 2020

Bohemian Abstract Daisy

I love daisies! So pleased to find some time the other day to grow an abstract daisy. Its created inside a friend's journal for the theme 'Bohemiam Floral'.

The photos show a short visual description on how it was painted. I've used Dylusions acrylic paint with various stencils by Tim Holtz, Dyan Reaveley and Darkroom Door, foam ink blending tools, paint pens, a watercolour pencil and paintbrushes.

It started off with Dylusions Paint in yellow (Lemon Zest and Lemon Drop) blended over the whole page using a Ranger Ink Blending Tool. Once this was dry, I added more layers one at a time (letting them dry inbetween), using a darker colour with each stencil design until the last stencil where I used Black Marble through the Darkroom Door Grunge Borders stencil. Some stencils I painted and then pressed onto the page.

bohemiam floral daisy artwork by Jenny James of South Australia

Once dry, I then sketched out a simple but very large daisy design using a blue watercolour pencil. Flower petals on daisies are simple... draw a circle (or trace a bowl) then add elongated loops or long ovals that butt into the circle. 

Don't worry if it doesn't look like a real flower, you'll find our eyes will see it as a flower whatever it looks like. Around the daisy I painted a wash of blue paint so that the background wasn't completely hidden. The watercolour pencil outline was activated with the water and blended into the paint easily. Any pencil marks still showing were washed off gently after the blue paint was completely dry.

Next was the centre of the flower. This is basically hundreds of overlapping dots (often called stippling) using a basic round paint brush (darker on the outside, lightest near the middle to give a rounded shape). Then for the final layer of spotty highlights and shadows, I used the end of my paintbrush (the wooden end creates fabulous spots). All the exes you can see were initially stenciled and then overpainted with white paint pen.

bohemiam floral daisy artwork by Jenny James of South Australia

Lastly, I added more white outlines and some thoughts using Tim Holtz Idea-Ology Stickers and Quote Chips over a strip of Idea-Ology Fabric Tape.

I love how much difference a few layers of paint makes to any artwork. Its amazing!

Make Today Count, Trust Your Heart and Tell Your Story!


Saturday, February 15, 2020

Summer TeaTime Collage Fun

Life is like a cup of tea... to be filled to the brim and enjoyed with friends.

Time for Tea conjures up all kinds of ideas... but eventually I nailed one down and started making Sharon a pot of daisy tea. The Tim Holtz Paper Dolls dropped by to help :)

I've made it with quite a few layers, not always happy with each one but it eventually turned out ok. Bright, colourful, full of sweet elements.
First thing I did was take the pages out of the ring binder and glue down some pretty doilies with a gel matte medium.

I then dragged the pages through puddles of Distress Oxide Ink (Squeezed Lemonade and Iced Spruce) on a craft mat but it seemed to stick to the paper rather than spread out. Nice colours but not quite the marbled background I envisioned.
Moving on, I sprayed both Distress Ink Stain (Twisted Citron, a gorgeous lime green) and Distress Oxide Sprays (Mermaid Lagoon and Cracked Pistachio) to the pages and it seemed to liven it up! I finished off the background with Distress Oxide Spray in Fossilized Amber (earthy yellow).

Once the inky background was dry, I gathered a couple of my fave Tim Holtz stencils (ZigZag and Blossom) and added their patterns using Dylusions acrylic paint (Mushy Peas and Calypso Teal) and an ink blending tool (foam applicator).

The next layer was made with the Finnabair Paper Texture Paste (it dries like homemade paper) and Tim Holtz stencil (Lace), spread with a plastic spatula.

An overview of the page so far...

While deciding what to do next, I stamped out a Darkroom Door teapot (set called Time for Tea), cups, spoon and teabags with black Ranger Archival Ink on white mixed media paper. I was toying with the idea of a colourful teaset... but I think the simple black and white is best.

Now the plaster was dry, I added Ranger's Gloss Transparent Texture Paste through the Tim Holtz stencil, Flourish, letting each section dry before adding more beautiful swirls.

This photo (above) is of the texture paste drying, with spots of Nuvo Drops scattered around.

The teapot was made 3D with the help of an Action Wobble... being adhesive backed help hold the Tim Holtz Idea-Ology paper flowers and little teabag strings in place too.

I coloured the flower centres in yellow ink and drew daisies onto the teabags. I was going to use real teatags but they were too big.

The rest of the elements are butterflies, daisies and roses from a pack of Tim Holtz Idea-Ology Botanical Layers, washi tape (more butterflies!), and a pair of Tim's Idea-Ology Paper Dolls.
The silver spoon is stamped using silver watercolour paint, then coloured some more with the same paint to darken the silver paint.

The final touches are a sticky note stamped with the quote, more butterflies, dribble of honey, glitter (sugar) on the spoon and another paper lace doily along the bottom.

Its turned out to be a pretty floral Spring-like page in the end. Thanks for reading :) Hope it makes you smile!

Happy Creative Day!
:)
Jenny

Thursday, September 19, 2019

Mother Earth Mixed Media

Gather all your left over yarns, wools, ribbons, strings! For this mixed media collage, they're being used to create the hair of Gaia (Mother Nature) while texture paste is used to create the Earth. Most layers will need to be left to dry for quite a while, depending how heavy handed you are with paints and water. The hair took 2 days until it was completely dry but is so worth the wait!

Finished artwork of Mother Nature and the Earth mixed media made with ribbons, paint and texture paste

Arty Treasures used ...

- Strathmore Watercolour Paper
- Tim Holtz Distress Grit Paste
- White Gesso
- Matte Gel Medium
- Yarns, ribbons and string
- Sizzix's Tim Holtz Thinlits "Skeleton Leaves"
- Tim Holtz Sidekick Die Cutting Machine
- Dylusions by Dyan Reaveley Rubber Stamp Sets
... "Clockwork" or "Never Forget Your Sparkle"
- Dina Wakley Scribble Sticks
- Metallic Watercolour Paints
- Finnabair Art Alchemy Liquid Acrylic Paints
- Finnabair Art Alchemy Sparks Acrylic Paints
- Ranger's Tim Holtz Sprayer Bottle (for water)
- Tim Holtz Spatulas
- Finnabair Paint Brushes
- Tim Holtz AquaBrush (waterbrush)
- Black and White Paint Pens
- Dylusions Glue Stick
- Thermoweb iCraft Mixed Media Adhesive
- Tonic Studio's Tim Holtz Mini Snips (small sharp scissors)
- Ranger Craft Mat

All available at the 'Art by Jenny' online shop

How to make this mixed media artwork...

Starting out, I scribbled ideas and thoughts into my notebook and once I knew where I wanted to go, I sketched the idea onto a large sheet of Strathmore Watercolour Paper.

sketching out the plan for the mixed media artwork featuring Gaia Mother Nature
Above photo shows the sketched image with a few wooden embellishments. Normally I'd use a watercolour pencil to draw the outlines but as I needed face and hands to still be visible after the next few steps, I've used a 2B graphite pencil.

adding texture paste to the Earth for the mixed media artwork featuring Gaia Mother Nature
To create dimension on the Earth, use a spatula to spread the Tim Holt Distress Grit Paste (its a sandy feeling, thick texture paste) wherever you want land. This paste doesn't shrink so what you place down is what you get, whether raised for hills and mountains or smooth flat for the plains.
Leave to dry.

closeup of colourful chunky yarn, ribbons and string to be used for hair
For the hair, gather any leftover yarns, ribbons, twine and string. It doesn't matter what colour they are because it all gets covered with white gesso are being glued down.

yarn and ribbon for hair of mixed media artwork featuring Mother Nature and Earth by Jenny James
Use a good quality gel matte medium like Finnabair 3D Matte Gel or Ranger's Tim Holtz Multi Matte Medium to adhere all the strands in place.

yarn and ribbon for hair of mixed media artwork featuring Mother Nature and Earth by Jenny James
In the photo above, you can see how I've twisted and woven the ribbons, string and yarn to give an illusion of wavy hair. Use the gel medium to glue down any wooden bird embellishments or other findings into the hair.

coating yarn and ribbon with gesso for mixed media artwork featuring Mother Nature and Earth by Jenny James
Once the gel medium is completely dry, cover the entire head of hair with white gesso. Don't forget to paint gesso on the inside of the curls.

waiting for gesso and texture paste to dry
The above photo shows an overview of Mother Earth keeping an eye on the planet and her hair as it all dries.

creating the Earth with Texture Paste for mixed media artwork featuring Mother Nature by Jenny James
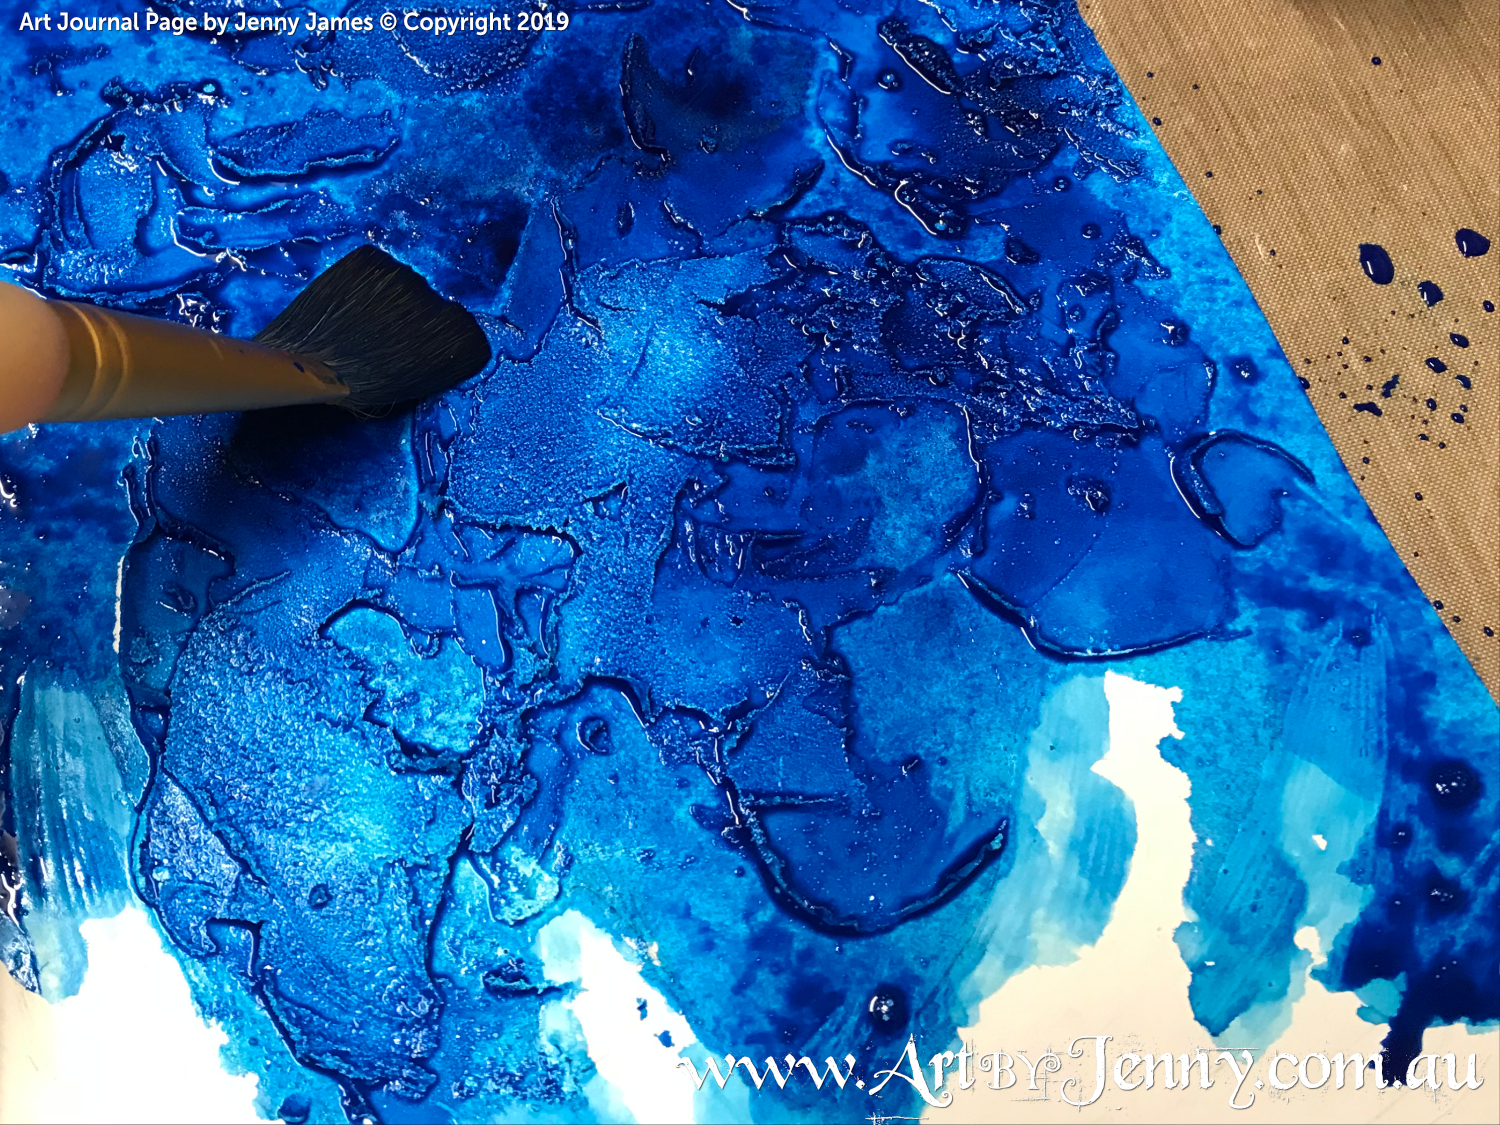
Back to the Earth, add 4 or 5 drops of Finnabair's Liquid Acrylic Paint in Ultramarine (blue) to the whole area. Spray the blue paint with 2 or 3 splashes of water and encourage it to spread using a flat wide paint brush.

creating the Earth with Texture Paste and paint for mixed media artwork featuring Mother Nature by Jenny James
While the blue paint is still wet, add 6 or 7 drops of Finnabair's Liquid Acrylic Paint in Pure Yellow onto the raised areas of the page. Pure Yellow can look slightly green in colour until water or medium is added, then it turns a gorgeous clean yellow. Its quite amazing!

creating the Earth with Texture Paste and paint for mixed media artwork featuring Mother Nature by Jenny James
Spray the newly applied drops of Pure Yellow paint with water and watch it spread. Use the paint brush to gently push it around if it needs a bit of help. Leave it to dry.
It may need more blue if the yellow got carried away but let it dry before adding any more paint or water.

hair texture for mixed media artwork featuring Mother Nature and the Earth by Jenny James
Using Dina Wakley Scribble Sticks or watercolours, colour in the background and all skin areas with a dark brown. Let it dry then add more dark brown paint into the shadow areas.
The hair was painted using a paint brush with Finnabair Art Alchemy Liquid Acrylic Paint in Avocado Green. Even though all the strands were covered in gesso, they all took on different tones, some soaking in more paint than others.

hair texture for mixed media artwork featuring Mother Nature and the Earth by Jenny James
I put on two coats of Finnabair's Avocado Green Liquid Acrylic Paint and it turned a beautiful dark green seaweed colour.
Leave it to dry!

Using the Dina Wakley Scribble Sticks, colour the background areas around the head and hands with dark pink and use orange in the triangular areas.

hair painting for mixed media artwork featuring Mother Nature and the Earth by Jenny James
Using the clean wet paint brush, dampen all the pink and orange to dissolve the paint and make them blend. Leave to dry.

hair highlights for mixed media artwork featuring Mother Nature and the Earth by Jenny James
Add more dark brown (Scribble Stick) to the face and neck leaving the eyes white. Making the shadows darker can create a more rounded look rather than flat. 
Colour in the eyes using Scribble Sticks in greens and blues with a round circle of black for the eye pupil.

Highlights on the hair were painted on using Finnabair Art Alchemy Sparks Acrylic Paint in Fairy Wings... a gorgeous shimmery pearlescent green paint.
The valley areas of the hair was painted sparingly with the Finnabair's Ultramarine Blue Liquid Acrylic.

The two little wooden birds in the hair were painted using Finnabair's Art Alchemy Metallique Acrylic Paint in Pearl White.

facial details for mixed media artwork featuring Mother Nature and the Earth by Jenny James
Finish off the face, making sure you let colours dry inbetween each layer. I've used paint pens for the eyelashes, eye pupils and white highlights. Scribble Sticks were used for the green eyebrows and heart shaped lips.

I didn't do her nose very well but I figure its art, not a photo - and besides, Mother Nature isn't a human so can look however she wishes to look!

colouring birds behind the scenes of mixed media artwork featuring Mother Nature and the Earth by Jenny James
Leaving the page aside to dry completely, stamp out a bird from Dyan Reaveley's rubber stamp set "Clockwork". Colour him in with Dina Wakley's Scribble Sticks (pink and brown) using a waterbrush to blend the colours.
You can use the waterbrush to take paint from the Scribble Sticks as well, a good way to add more colour to detailed areas.

painting leaves in behind the scenes of mixed media artwork featuring Mother Nature and the Earth by Jenny James
Cut out some leaves from watercolour paper using the Tim Holtz Thinlits "Skeleton Leaves" die templates (and die cutting machine).
Try to keep some of the leaves intact and separate the inners from a few others.
Colour all the leaves and spare pieces of watercolour paper with yellow and green Scribble Sticks.
Leave to dry.

painting leaves of mixed media artwork featuring Mother Nature and the Earth by Jenny James
Glue the leaves with separated inners to the spare watercolour pieces using Gel Medium or Mixed Media Adhesive. Scribble on some dark brown to the edges of each leaf while the glue is still wet. Use the waterbrush to encourage the brown paint blend into the outer edges.

In the photo, the colours look a bit murky but the Gel Medium dries completely clear with a matte finish, allowing all the colours to show beautifully.

behind the scenes of mixed media artwork featuring Mother Nature and the Earth by Jenny James
On your craft sheet or paint palette, add some gold metallic watercolour paint. Either drag the side of the leaf across the gold paint and / or use a brush to paint it onto edges of the leaves. Try both ways and see which way you like the best.

In the above photo with the leaves, I've also applied gold watercolour paint to Sizzix Tim Holtz Thinlits "Adorned" shapes and have saved them for another day.

bird close up mixed media artwork featuring Mother Nature and the Earth created by Jenny James
Once the leaves are completely dry, trim off the excess using Tim's Mini Snips. They're sharp and easy to use for detailed fussy cutting. 
Using the brown Scribble Stick, roughly colour around all the cut edges of the leaves.
Place three of the leaves under the bird and stick them onto the hand, another leaf near the thumbs and two more on the top left hand corner of the page.

finished mixed media artwork featuring Mother Nature and the Earth created by Jenny James
Using the black paint pen, write some words, draw some leaves and add curly tendrils all around her head and hands.

Thanks so much for reading and checking out my artwork. Hopefully the instructions are easy enough to follow and inspires you to have a go :) Have fun!

Have a wonderful, happy creative day!
:)
Jenny