Showing posts with label watercolours. Show all posts

Saturday, December 14, 2019

Galahs Christmas Party

Happiness is a gathering of Aussie Galahs having a Christmas party, wearing dress-ups made from the Tim Holtz Merry Misfits Stamp Set. Under their playground of Idea-Ology embellishments and trimmings is a holly forest grown with layers of plaster, paint and collage paper.

Australian Galahs Christmas Party 2019 mixed media art by Jenny James
This fun Christmas artwork was created over a few days as ink needed to dry and the galahs couldn't decide where they wanted to perch, or even who was going to dress up as Santa and Rudolph. Finally they decided but I still made their masks and hats repositionable, so everyone can take a turn!

Australian Galahs Christmas Party 2019 with seed lights - mixed media art by Jenny James
I love the Idea-Ology Date Dials from Tim Holtz. They make such a wonderful compact perpetual calendar when matched with a brad, backing image and a pair of tiny Idea-Ology Clock Hands. My new calendar is now hanging from a clip at the top of the artwork with a couple of Idea-Ology Christmas charms so it can be opened easily without falling off the page. Plus, it's not on the page permanently, so it can be reused for other special events throughout the year. So they're beautiful and practical :)

To finish off this Christmas display, I looped in a string of seed fairy lights along the tinsel and held it in place with Tim's little bulldog clips, also called Idea-Ology Hinge Clips.

List of Treasures Used...

- Mixed Media Heavyweight Paper, 9"x12" (for the background)
- Strathmore Watercolour Paper, smooth hot press (for stamping)
- Tim Holtz Idea-Ology Tissue Fringe (all Tim's trimmings are here)
- Tim Holtz Distress Spray Stain, Tarnished Brass (all Tim's spray inks are here)
- Distress Sprayer Bottle (all Tim's tools are here)
- Tim Holtz Splatter Brush
- Tim Holtz Ink Blending Tool and Replacement Foams
- Tim Holtz Plastic Spatula (palette knife)
- Heat tool
- Brusho Sprinkle-It, Gold, Iridescent Gold (click here for all Brusho)
- Brusho Crystal Colours (powdered watercolour paint in Leaf Green, Ultramarine Blue)
Tim Holtz Layering Stencils  (Thatched, String, Pines)
- Finnabair Art Basics Plaster Paste (all mixed media mediums are here)
- White Gesso
- Dylusions by Dyan Reaveley Ink Spray (Blue Lagoon, Island Parrot)
- Tim Holtz Idea-Ology Collage Paper (Holly)
- Ranger Archival Ink Pad (Black Soot, London Blue, Vibrant Turquoise)
- Tim Holtz Distress Ink Mini Inkpad, Walnut Stain (all Distress Ink Pads)
- Dina Wakley Scribble Sticks (watercolour paints)
- Gel Matte Multi Medium (Tim Holtz Collage Medium, Ranger's, Dina Wakley's or Finnabair, something that dries matte (not shiny so overflow is hidden), acid free, non-yellowing and has a strong hold)
- Ranger 3D Clear Foam Tape (all adhesive tape is here)
- Tim Holtz Waterbrush (Aquabrush)
- Tim Holtz Retractable Craft Pick
- Tim Holtz Retractable Craft Knife
- Tim Holtz Stamps (Bird Crazy, Merry Misfits, Psychedelic Grunge)
- Darkroom Door Background Stamps (Knitting, Plaid)
- Acrylic Stamping Block
- Tim Holtz 5" Mini Snips, left and right handed (all scissors are here)
- Sizzix Tim Holtz Framelits Bird Crazy (all die cutting designs are here)
- Tim Holtz Thinlits, Village Christmastime
- Tim Holtz Idea-Ology Printed Paper (Christmas Stash 8"x8")
- Tim Holtz Idea-Ology Embellishments (Date Dials, Brad Fasteners, Journal Cards, Pocket Watch, Clock Hands, Resin Reindeer, Metal Snowflakes, Halloween Tokens (owls), Baubles, Quote Chips (Christmas, red edition), Metal Typed Tokens, Gold Micro Tinsel Ribbon, Christmas Adornments and Charms)
- Tim Holtz Distress Dry Glitter (all glitters are here)
- Winsor & Newton Iridescent Medium
... if you can't find something, sing out anytime!

All arty treasures are available in the 'Art by Jenny' online shop

How the Party Started...

Making Golden Tinsel out of Paper Fringe


Tim Holtz Idea-Ology Trimmings and Brusho SprinkleIT - mixed media art by Jenny James
Starting with the Tim Holtz Idea-Ology Fringe (orange and black paper tissue fringing) and Tim Holtz Distress Spray Stain in Tarnished Brass, I made some mini tinsel. I also sprinked on the Brusho SprinkleIT Gold watercolour powder while the ink was still wet. Then to see how it looked, I added the Brusho SprinkleIT Iridescent Gold. Such a pretty sparkly shimmery dust.

The paper fringing took on the colours and water really well and although I used a fair amount, the paper didn't deteriorate much at all. Thank goodness! I had a backup plan of using real mini tinsel (aka shopbought) but I'm so pleased it worked well.

Tim Holtz Idea-Ology Trimmings Paper Fringe - mixed media art by Jenny James
The above photo shows the fringing fluffed up next to the distressed and stained version. To make it fluffy, simply scrunch it up gently and roll it around in your hands. This ready to use fringing is much easier (and faster) than cutting lengths of fringe by hand!

Creating the Background...

I started with a sheet of Mixed Media Heavyweight Paper. To build up the layers so there was plenty of texture and depth to the forest background, I used Finnabair's Plaster Paste with Tim Holtz Layering Stencils.

Apply the Finnabair Plaster Paste through the stencils using a wide, flat spatula (Tim Holtz black spatula from the set is perfect for this). You could also use an old plastic card or silicon tool but the spatula has a smaller work surface that enables you to apply plaster only where you need it.

 Finnabair Prima Marketing Plaster Paste with Tim Holtz Stencils - mixed media art by Jenny James
The Tim Holtz Layering Stencil "Thatched" and "String" were used on the corner areas, "Pines" was used to grow a forest then lastly, "Code" was used to fill in any gaps.
The plaster was dried using the heat tool when extending the pattern of the forest so the trees didn't get flattened when adding more.
I recommend you apply a coat of gesso (clear or white) at this point, something I didn't do. It will help stop the ink in the next steps from soaking into the plaster.

Different kinds of texture pastes, embossing pastes and other dimensional mediums react in all kinds of ways to inks and paints. Experiment and watch what happens! Remember, its art - therefore you can't make a mistake or break anything. Simply enjoy :)

Dylusions by Dyan Reaveley Ink Spray with Tim Holtz Stencils - mixed media art by Jenny James
The next step was to add some colour. Place the background in a spraybooth or box (it saves your work surface) and spray the top area with Dylusions Ink Spray Blue Lagoon leaving most of the paper white. Spray with water to encourage the ink to move down the surface.

Dylusions by Dyan Reaveley Ink Spray with Tim Holtz Stencils - mixed media art by Jenny James
Turn the paper upside down and spray across the top with Dylusions Ink Spray Island Parrot (gorgeous vibrant green). This encourages the green and blue to mix and blend however it wants, sometimes giving you lines of drips, other times blending so much they're undefined areas of colour. Either way, it'll be beautiful.

The above photo was taken when the ink was still wet. When it dried, the ink faded into this gorgeous vibrant ocean colour with lime green patches.

Brusho Crystal Colour by ColourCraft on green and blue background - mixed media art by Jenny James
I loved the colour of the background but it needed to be darker as it was a forest, not the seaside!
I decided to use Brusho Crystal Colour watercolour powders in Leaf Green and Ultramarine Blue sprinked over selected areas (in other words, just about everywhere in the end).

Brusho Crystal Colour by ColourCraft wet after adding water - mixed media art by Jenny James
Mist water over the whole surface. Not too much but not too little... the paint needs water to release the colour but too much will make the surface boggy.
This is something that needs experimenting with too, as the results will differ with different paper, quantity of paint, amounts of water and drying time. But its fun to play :)

Using a heat tool again, I removed most of the moisture from the surface and then put it aside to dry properly.
Due to how much ink, paint and water I used, it needed to be left until the next day.

Brusho Crystal Colour by ColourCraft dried watercolour abstract - mixed media art by Jenny James
Once dry, I used a Ranger ink blending tool (with the round foams) to apply dark brown ink around the outside edge of the surface and over parts of the raised areas. Then I stamped the halftone background stamp in brown as well but it disappeared while it dried, merged with the other colours and plaster paste. Didn't matter, I knew it was there!

Loving the dark greens! To darken parts of it even more, I changed to Ranger's Archival ink pads (Dylusions' London Blue and Vibrant Turquoise) and blended ink directly to the raised areas using the actual inkpad. Normally I'd use the ink blending tool. The colours stayed visible this time.

Once this initial set of layers was dry, it was time to add dimension with tinsel, embellishments and the cast of crazy galahs.

Paper Fringe Tinsel on the dark green textured background  - mixed media art by Jenny James
The tinsel, now fully dry, was laid onto the background and glued in place using a gel matte medium. A length of Idea-ology mini gold tinsel was intertwined around the paper tinsel and also glued down with gel matte medium. I then sparingly dry brushed Winsor & Newton Iridescent Medium over the paper tinsel to enhance the gold even more.

Tim Holtz Ideaology collage paper and tinsel with a sleigh - mixed media art by Jenny James
Santa's Sleigh ... This was made from a sheet of tartan or plaid printed paper with the Sizzix Tim Holtz Thinlits "Village Christmastime" sleigh and reindeer template. After cutting out with the Big Shot Plus die cutting machine, the edges were inked with dark brown ink.

To create a shimmery spatter of starry spots over the background, mix a 10 cent piece size of white gesso with equal parts W&N Iridescent Medium and a splash of water. Use a splatter brush or your fingers to flick the paint mixture over the background.

To break up all the dark green, glue down torn pieces of holly, music and words from Tim's Idea-ology Collage Paper "Holly". The sleigh was glued down over the holly, angled to appear to be flying over the scene.

Making the Characters and Party Outfits...

Every party needs guests, dress ups and masks. The galahs, reindeer and dress-ups were created using the Tim Holtz Stamp Sets, Bird Crazy and Merry Misfits.

Tim Holtz Rubber Stamp Sets Bird Crazy and Merry Misfits - mixed media art by Jenny James
Each rubber stamp was mounted onto a clear acrylic stamping block and the image printed multiple times onto Strathmore's Watercolour Paper with Ranger's Archival Ink (black). I always stamp out more than I need, then I've spares to use another day!

Tim Holtz Rubber Stamp from Merry Misfits with Darkroom Door Knitting Stamps - mixed media art by Jenny James
The reindeer masks had some texture added using the spotty halftone design from Tim's Stamp Set, Psychedelic Grunge and two Darkroom Door background stamps, Knitting and Plaid.
Using Walnut Stain (dark brown) Distress Ink Mini Inkpad, ink up just part of the stamp (see the dark area on the rubber stamp above), just enough to cover one reindeer head. Press to print onto the reindeer's face.

Tim Holtz characters Bird Crazy and Merry Misfits - mixed media art by Jenny James
Cut out all all the birds using the matching Tim Holtz Framelits die cutting templates with a die cutting machine (like a Sizzix Sidekick, Big Shot or a Cuttlebug) or fussy cut around each shape using Tim's Mini Snips (fine sharp scissors). Use the same scissors to trim around all the reindeer heads, one reindeer, the snowman's hat and Santa's head.
Use the ink blending tool that still has Walnut Stain on the foam to ink around the edges of all characters and masks. This hides the white paper core, making them blend better with the background.

Tim Holtz characters Bird Crazy and Merry Misfits coloured with Dina Wakley Scribble Sticks - mixed media art by Jenny James
All stamped images were coloured using Dina Wakley Scribble Sticks with waterbrushes. You can use anything to colour stamped images ... pencils, watercolours, Distress Inks, markers, crayons and pastels. Its best to use a translucent ink or paint so the details still show through when you paint over them. A gouache or acrylic paint will cover everything as they're a solid, more opaque medium.

Tim Holtz characters Bird Crazy and Merry Misfits coloured with Dina Wakley Scribble Sticks - mixed media art by Jenny James
To colour with watersoluble crayons or art sticks ... Make sure the tip of the waterbrush is wet and brush the end of a fuschia pink Scribble Stick to collect the paint. Blend the pink onto the craft mat or paint palette to create a small puddle of paint which is used to paint the birds. As you can see, I created 3 puddles of paint - pink, grey and yellow. The peachy colour was used under their beaks.
Rudolph's red nose, the snowman's top hat and Santa's hat were coloured with Candy Apple (bright red) Distress Watercolour Marker then layered with a glitter pen.

Idea-Ology Embellishements...

Giving the guys something to play with is important for any Christmas party! Tinsel needs baubles, shiny ornaments and a calendar to count down the days to the big event.
What do you do if you can't decide which metal Idea-Ology adornments and charms to use? Colour them all... and decide later.

Tim Holtz Idea-Ology embellishments and findings being altered with silver ink - mixed media art by Jenny James
I've used all my favourites : snowflakes, mirrored stars, owls from the halloween pack, the bird from another pack, typed tokens, word banners (which I didn't use in the end), pocket watches, brad fasteners, date dials and clock hands.

The Ranger Alcohol Ink Mixative (silver) was used to colour most of the adornments, using a piece of felt, packaging from the pocket watches and a pair of tweezers. I used the felt as a brush and painted the pieces silver, using the other end of the felt to polish off excess ink after they were dry.
Alcohol Ink doesn't take long to dry so its a fiddly but quite fast process.

Tim Holtz Idea-Ology charms being altered with dry glitter - mixed media art by Jenny James
I felt the snowflakes and baubles need a splash of shimmery glitter, so they were thinly coated in Ranger's Gel Matte Medium (use a brush or fingers, whatever works for you) and dipped into the jar of Tim's Distress Dry Glitter.

Tim Holtz Idea-Ology Date Dials and Pocket Watches - mixed media art by Jenny James
The sizes of the Idea-Ology pocket watches and date dials match each other perfectly. I put together two pocket watches with the date dials inside but only ended up hanging the larger one on the artwork with the birds.

How to use Tim Holtz Idea-Ology Date Dials and Pocket Watches - mixed media art by Jenny James
To make the perpetual calendar using the large pocket watch, cut around the larger template from the packaging to use as a guide for the paper backing circles. I used a Tim Holtz Idea-Ology Journal Card and added extra layers for underneath using packaging.

To find the centre of the circle, fold the template into quarter (half, then half again). With this triangular shape, line up the curved edge onto your circle and using the retractable craft pick, carefully poke a hole in the centre of the backing paper.

How to use Tim Holtz Idea-Ology Date Dials and Pocket Watches - mixed media art by Jenny James
Piece together the clock hands, spacer (2.5mm sequins are perfect) and a brad fastener (split pin). Place the larger date dial onto the paper circle and poke the brad into the paper circle so the hands are above the date dial.

How to use Tim Holtz Idea-Ology Date Dials and Pocket Watches - mixed media art by Jenny James
On the back of the group, push back the pins and adhere tape to hold them in place on the backing piece of the pocket watch.

How to use Tim Holtz Idea-Ology Date Dials and Pocket Watches - mixed media art by Jenny James
Just before you put the front cover piece onto the pocket watch, turn the hands to point wherever you wish. At first I used the little hand as the day and the big hand for the month, but changed it to the other way round.

While the perpetual calendar doesn't move by itself, its easy to lift off the pocket watch front piece to change the hands.
I made the smaller pocket watch in the same way, except instead of clock hands I used an old dreamcatcher earring.

placement of the Australian Galahs and their friends - mixed media art by Jenny James
One of the tiny metal feathers from the earrings was given to one of the crazy birds (top right) so he could have a magical wand too, just like his feathered friend (far left) who was given a starry wand.

Finished Artwork of the Australian Galahs and their friends having a fancy dress party - mixed media art by Jenny James
Place all the characters, mirror stars, baubles, decorations and date dials according to how they make you smile.

Glue everyone and everything down (except the date dial unless you wish it to be permanent too) using a gel matte medium and add more glitter to the two wands (feather and star) as well as Santa's hat band.

Finished Artwork of the Australian Galah dressed as Rudolph the Red Nosed Reindeer for Christmas - mixed media art by Jenny James
I changed my mind about all the reindeer masks and only used the antlers! One was left whole for a Rudolf mask which has silver sewing thread tied to it (just like a real one) so everyone can take it in turns to wear it. The Santa mask and snowan's top hat are loose too. Don't forget to draw on eyes so they can see!

Here are a few closeups...

Finished Artwork of the Australian Galahs having fun this Christmas - mixed media art by Jenny James
Finished artwork closeup photo ... Aussie Galahs dressed as a fairy and Santa Claus.
Finished Artwork of the Australian Galahs having fun this Christmas - mixed media art by Jenny James
Tim Holtz Date Dial inside a Pocket Watch next to a Merry Misfit Reindeer and Bird Crazy Aussie Galah.
Finished Artwork of the Australian Galahs having fun this Christmas - mixed media art by Jenny James
Aussie Galahs playing dress-ups wearing reindeer antlers and a snowman's top hat.
Also showing the glitter encrusted Idea-Ology baubles and snowflakes with an owl ornament.

Thanks so much for reading and checking out my mixed media artwork for Christmas 2019. I hope it makes you smile and encourages you to have a go. I'm here if you need help anytime :) Have fun!

Have a wonderful, happy creative day!
:)
Jenny

Friday, August 2, 2019

Haiku Art with Watercolours

Haiku Watercolour Painting by Jenny James - Dragonflies Hover Above the Waterlilies Hungry are the Fish
Dragonflies Hover
Above the Waterlilies
Hungry are the Fish
by Jenny James

Who knew I could write poetry? There's a first for everything! My watercolour painting skills are constantly improving too, proving that with practice one can achieve anything.

This is my Haiku Art Page created for Pam inside her book as part of the Australian Art Journal Swap group (click here to check them out). Today's blog post is more of a journey through how my painting was created rather than the usual step-by-step but it still includes helpful information and useful tips.

Haiku Watercolour Painting by Jenny James - sketchbook image of starting out initial ideas
In the beginning... it always starts with scribbling out ideas on scrap paper then nutting them out in my journal.
To make sure my elements didn't end up like cartoon characters, I used photographs I found on the 'net of fish, waterlilies, dragonflies and underwater views for inspiration and technical details.

Writing a poem with the correct number of syllables was interesting. Once I worked out what I wanted to paint or create (dragonflies and waterlilies) and realised it didn't have to rhyme, it was much easier.

Haiku Watercolour Painting by Jenny James - sketching out the design
It was planned to be a pair of koi (mine look more like giant goldfish) swimming with the dragonflies flying overhead, with the viewpoint being from underwater.

Haiku Watercolour Painting by Jenny James - water soluble pencils to start with
Less is more... so I started with water and pencils as I'm always heavy  handed when I use paint. I coloured in areas then used a very wet watercolour brush (with soft bristles) to dissolve all the colour.
I then waited an eon for it to dry. Well, maybe 10 minutes...

Haiku Artwork by Jenny James showing the Winsor & Newton Paint Sticks
Still trying to be "less is more" but pencils weren't giving me enough coverage, so dug out my Winsor & Newton watercolour paint sticks... I've included this closeup to show the amount of paint used, hardly any compared to how I usually work. I love the texture of pencils and paint sticks on rough paper!

Haiku Watercolour Painting by Jenny James - waiting for paint to dry
I painted more water onto the page (dissolving the paint sticks) and let it dry again... the second fish decided it didn't want to join us, so that's where the quote is going.

Haiku Watercolour Painting by Jenny James - more layers of paint in blues and greens
"Trust the Mess" ... that's what we're told to do so many times with abstract art and other types of creativity, but its harder to do than waiting for paint to dry! lol :) Took a couple of hours this time.
This photo is showing what happens when you give up on micro layers and just go for it. Thank goodness its meant to look like water hey? At this point, I felt happy with the clouds and tiny forest in the background but the rest is such a mess!

Haiku Watercolour Painting by Jenny James - photo of my workspace
This is my favourite palette! This pic was after adding pink gouache to the petals, brown to the stems and shadows in the water.
Things we take photos of when waiting (again) for paint to dry...!

Haiku Watercolour Painting by Jenny James - work in progress
I really love painting with watercolours... especially when its working! Above is showing that messy page after it dried completely (lovely!) and includes the details added - lily pads, flower and leaf stems, bit more blue in the water and reflections under the waterlilies, forest and lily pads.

Haiku Watercolour Painting by Jenny James - Dragonflies Hover Above the Waterlilies Hungry are the Fish
The flowers are painted using the magenta paint and brown for the shaping and shadows.
All that's left to do are all the bubbles, the fish's details and other bits and pieces.

Haiku Watercolour Painting by Jenny James - adding details to the fish
Here fishy fishy... meet my giant goldfish eyeing off the dragonflies above. The bubbles have white paint pen highlights and brown paint underneath to make them appear round.

Haiku Watercolour Painting by Jenny James - finished picture of dragonflies hovering over waterlilies
Sorry, no progress pics for the dragonflies.... they weren't behaving! Thank goodness they turned out ok... especially after they'd dried. When the wings were still wet, they looked really dark but dried with a satisfying transparent finish.

To make the dragonflies, I used a sharp black water-soluble pencil to draw an oval for the abdomen, long super skinny tube shape for the body and long triangular ovalish shapes for wings. Add a bit of green to the body then using a fine wet paint brush and blend out the colours trying to keep the black to the outer edges.
Add fine wobbly lines for the wing veins and antennae using a very fine paint brush (or pen) in black. Eyes are spots using white paint pen.
I used more pencils and watercolours (using a dry paintbrush)  to add depth and shadow to everything.

Haiku Watercolour Painting by Jenny James - finished picture of the hand lettering under the waterlilies
The lettering for the quote is drawn freehand with pale blue pencil then I went over it (sort of) with black pencil. Then using the blue pencil again, I added extra words to make the dodgy bits look like they were meant to be there (of course they were).

Haiku poems need to have a certain amount of syllables in each line... 1st is 5 syllables, 2nd is 7, 3rd is 5. Thankfully it doesn't need to rhyme but it should make a bit of sense and relate directly to the artwork. Definitely a challenge, but one I enjoyed :) You should have a go too!

Then the 3 little fishes with their teeny tiny bubbles were drawn in too, just because. The writing is all a bit crooked, but then again, it is underwater! lol :)

Haiku Watercolour Painting by Jenny James - finished artwork of dragonflies hovering over waterlilies with koi fish
So this is my finished artwork for the theme, Haiku Art Page.

Thanks so much for visiting and reading my blog post. Hope my instructions help and it inspires you to have a go. The main thing to remember with watercolour painting, is to let the layers dry completely before adding more colour. Unless you're trying to create marbled blends then that's a whole other way to play!

Have a happy creative day!
:)
Jenny

Thursday, September 28, 2017

Finding Nemo Meets Dylusions

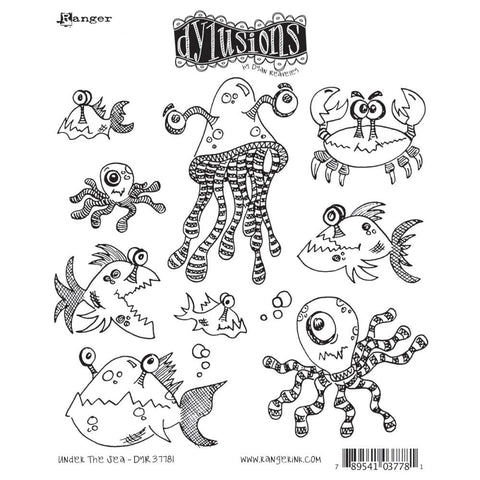
This is what happens when Dylusions' Under the Sea critters meet the theme "movie quote".

I know its the seaguls that are famous for the quote "mine mine mine..." but I'm sure the little crabs said it too! As well as "hey hey" :) lol Will just have to watch the movie again!


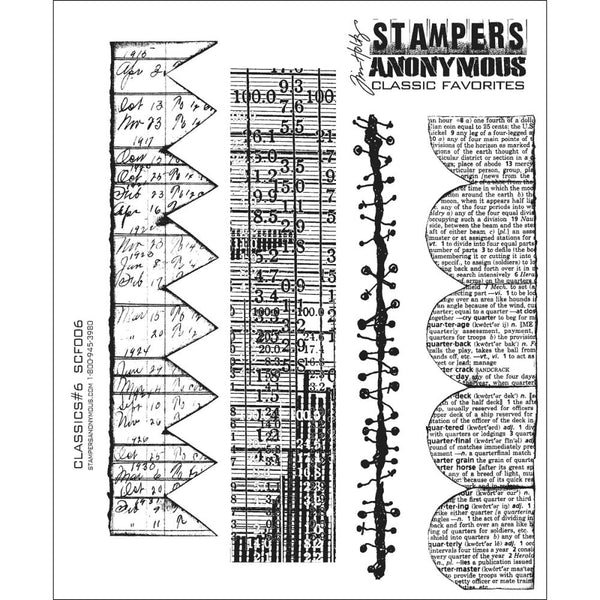
The background was made using Distress Ink Sprays (Dylusions Ink Sprays and watercolours can also be used) then stamped with the long spotty (used as seaweed here) Stampers Anonymous Classic Borders and IndigoBlu Ink Splats stamps. I also stamped Darkroom Door Polka Dots background stamp with water, not that it showed very well. Looks fine in the photo!


More layers were added using Tim Holtz layering stencils (Splash, Bubbles) with Distress Inks in Picket Fence (white), Faded Jeans and Mustard Seed. 


Next was the circle from Tim's Brush Strokes stamp set. This solid looking stamp set is fantastic for kiss stamping, adding large areas of colour and using as word bubbles :)


Using Yasutomo Mineral Multi (Mixed) Media Paper and Archival black ink, I stamped the crabs and fish from Dyan Reaveley's groovy stamp set.

I coloured them with Jane Davenport Mermaid Markers. This unique paper doesn't soak up the ink, but lets it sit on the surface allowing the colours to blend beautifully as it dries.

Too much water and ink creates a bit of a mess (as you can see with the crabs) but that doesn't matter when they're being cut out.


Cutting the Mineral Paper was different to other mixed media paper. Made from rocks instead of cotton or trees, its a paper similar to Yupo but thinner/lighter, and is so smooth the scissors glide through easily, hardly any friction at all.

I used the Kuretake Hikkei Brush Pen (black marker) for extra details on the fish and crabs, as well as the words. I also used my white Sharpie for the eye highlights.


Overall, the page turned out ok :)


It was alot of fun using these critters... they always make me smile!

Thanks for visiting my blog. Have a happy day!
:)
Jenny


Retail Therapy...
The following are a few treasures used in the creation of this art journal page.

SaveSave