Showing posts with label acrylic paints. Show all posts

Saturday, November 2, 2019

A Bucketful of Art

My Bucket List is art, art and more Art!

A bucket list isn't something I've ever really thought about until now. It turns out that dreams are just like a bucket list and I've had plenty of those... as you do! They've changed over the years but there seemed to be a reoccurring theme... Art. I guess you're not surprised :) lol

Art by Jenny mixed media journal page artwork featuring the theme Bucket List
Have an art gallery and studio, guesthouse B&B for art retreats, online and real world classroom, and little shop. Creating, sharing, teaching, inspiring, healing and helping. By the seaside, anywhere in Australia. I'm getting there, one tiny ant sized step at a time I'm managing to create a Life Less Ordinary through art, art, art and more art :) Why not!

So this is what I've created for Meg's journal that's travelling around Australia with the theme "Bucket List". A few thoughts about art. Its more like a sampler the way it got created but art doesn't have rules or must have any particular look. You can see all our other journals at the Australian Art Journal Swap Blog.

List of Treasures Used...

- Mixed Media Paper
- Dylusions Acrylic Paint
- Ranger Mini Ink Blending Tools and Foams
- Tim Holtz Tonic Studio Mini Snips
- Ranger Embossing Powder
- Darkroom Door Stencils
- Tim Holtz Layering Stencils
- Tim Holtz Foam Stamps
- Tim Holtz Collage Gel Matte Medium
- Tim Holtz Idea-Ology Transparent Wings
- Tim Holtz Idea-Ology Quote Chips
- Tim Holtz Stamps "theories"
- Ranger Archival Ink Pad, Jet Black
- Dylusions Acrylic Journaling Block
- Finnabair Paint Brushes
- Masters' Brush Cleaner
- Tim Holtz and Dylusions Stickers
- Dylusions Glue Stick
- Chipboard Letters
- An Old Paintbrush
- Wooden Sticks (for the pencils)

All available online at Art by Jenny

Start with a background...

Make sure you're using a good quality paper that withstands wet and dry visual arts techniques. You can find mixed media paper in so many brands now, but my go-to papers are still Dylusions by Dyan Reaveley journals (made by Ranger) and Strathmore's Mixed Media and Watercolour Papers (and journals and artboards)... use what you have and when you run out, try these. Yes I sell them both, but I only because I love and use it all myself :D

I've used Dylusions Acrylic Paints for all the background and overpainting... its such a beautiful smooth, quick drying paint. Perfect for journals.

creating the background for Mixed Media artwork by Jenny James featuring the theme Bucket List
Smoosh, swirl and blend Dylusions Paint in Mushy Peas and Calypso Teal over your whole surface using one of my fave little tools, the Mini Ink Blending Tool from Ranger.
The easiest way to start is to take a spot of paint from the jar (and put the lid back on straight away), and press it onto your craft mat or flat paint palette. Swirl it into your foam tool in a circular motion (it spreads it evenly through the foam). Smoosh (spread, blend, move in any direction) the paint over your page.

I've used a spirally circular pattern this time. The pattern changes with the mood, weather and paper so let the hand and foam do whatever it wants at this stage. Just enjoy the blending of colours.
The stripe down the centre is a white washi tape as I didn't want the paint going through to everyone else's pages. Sometimes this disappears under all the layers of paint and collage.

Don't forget : Add a spray of water into your jars of Dylusions Paint to put back the moisture that evaporates while you have the lid off. Even in Winter but especially in the Aussie Summer!

The ink blending foams are washable but wash them before they dry out! The end of the day is fine, it doesn't dry that fast on foams :)
The easiest way to clean foams is to use up all the paint on future backgrounds, journal pages and paper that can be used in collage (smoosh it around until its all gone), then wash the foams with soapy water (I use Master's Artist Handsoap for my hands and stencils, Master's Artist Brush Cleaner for my foams, brushes and gel printing plates).

creating the background for Mixed Media artwork by Jenny James featuring the theme Bucket List
The large Darkroom Door "Crackle" stencil above was used to add a bit of Dylusions Lemon Zest (yellow), and the Tim Holtz "Grime" (my new favourite) and "Splatters" Layering Stencils were used with the pretty Calypso Teal blue acrylic paint.

I've blended paint through all the stencils using the same foam tools, one for white, the other for everything else.

creating the background for Mixed Media artwork by Jenny James featuring the theme Bucket List
When using stencils, its up to you which part of it you wish to use... the whole design, part of it, upside down, back to front. If you want to add more, add more. Want to leave it simpler, go for it - its art, there are no rules or mistakes :)

an overview of the background for Mixed Media artwork by Jenny James featuring the theme Bucket List
The above photo is an overview of what was starting to look like a pond or river. Initially I thought I might make a bucket list on kites, clouds or lily pads - none of which happened but I really love these colours!

Add more layers...

more stenciled layers on the background for Mixed Media artwork by Jenny James featuring the theme Bucket List
Once all the background base has dried, add a layer of Dylusions White Linen Acrylic Paint using your favourite words stencil. I've used Darkroom Door medium sized stencil called "Creativity".

painting in featured areas for Mixed Media artwork by Jenny James featuring the theme Bucket List
Once this was dry, I added Maisie, a Dylusions by Dyan Reaveley stencil and mask set (this one's the middle child), also using Dylusions White Linen Paint. Then using a paint brush, I add extra white to create definition in her hair, skirt and boots.

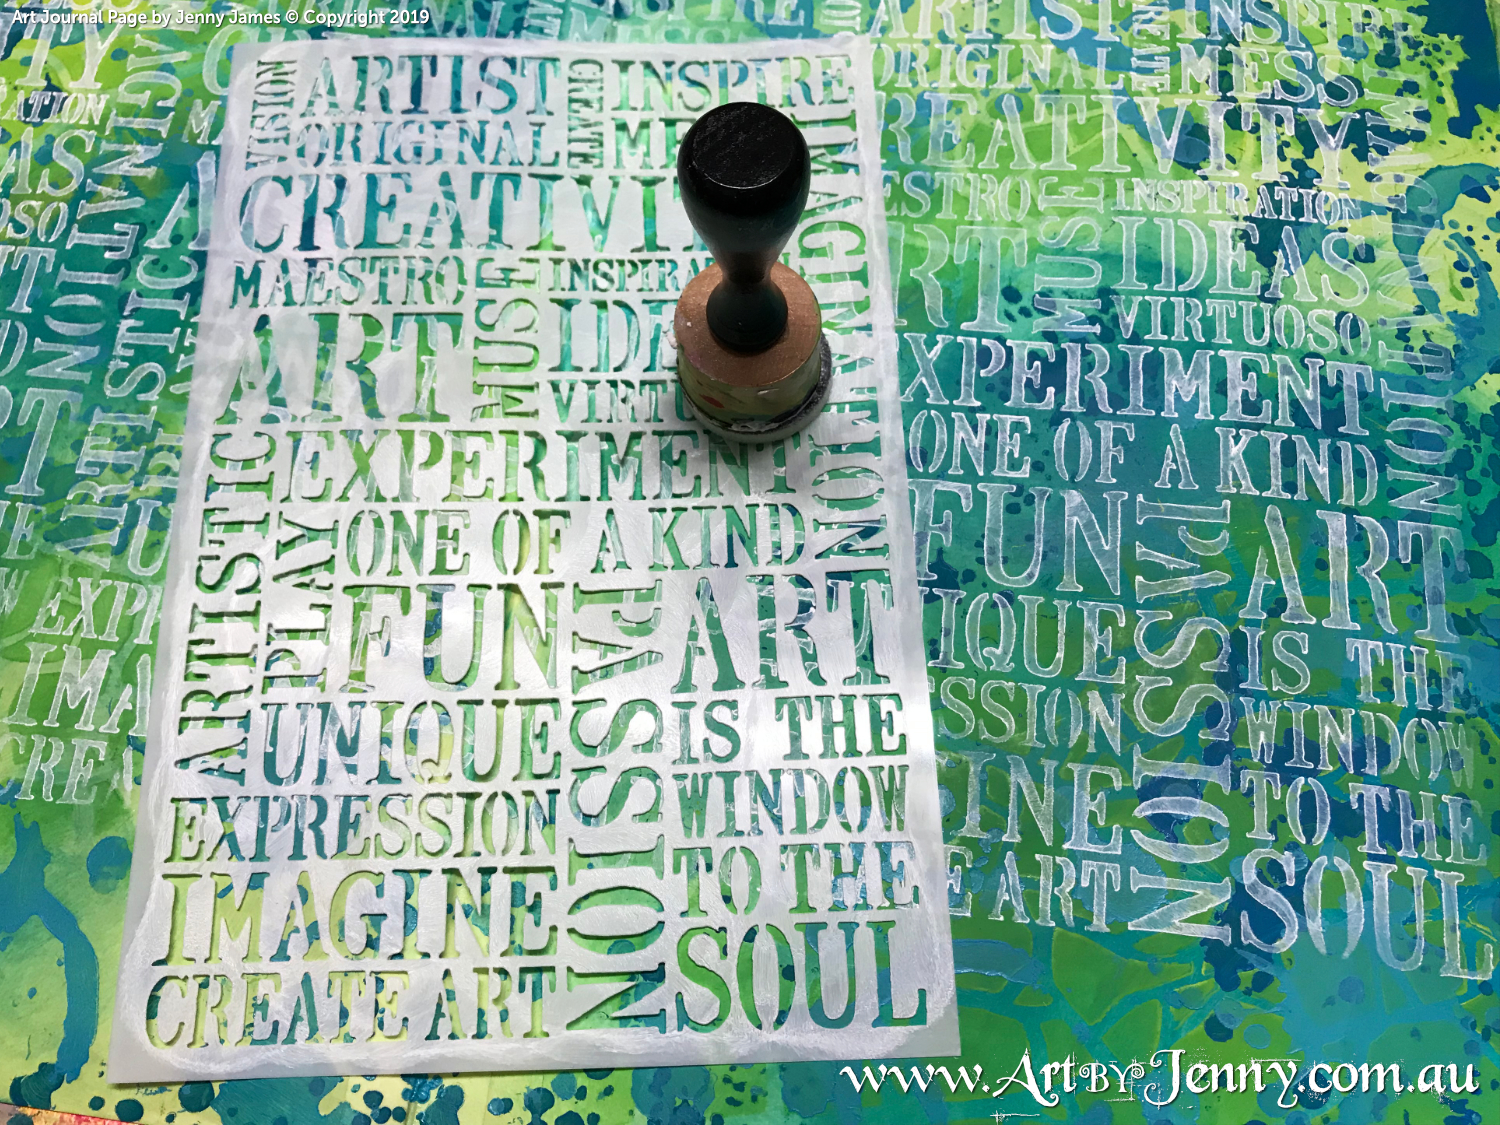
Art is the Window to the Soul, view of the art journal page through the stencil
Above : Art is the window to the soul ... I saw this as I lifted off the Maisie Stencil after painting her basic shape - so of course it had to be photographed :) The border or rather, window, is the actual stencil of her head. Seemed perfect at the time! lol :)

Making Pencils...

art journal page wip showing how to make pencils with collage by Jenny James
In the past I've used skewers and tooth picks to make pretend pencils and paint brushes. Usually I'd colour them with markers, paint or pencils, then for the brushes, squishing the ends with pliers to make into faux bristles.

This time I've used skinny flat sticks (wood spatulas or thin iceblock sticks) and cut to shape using Tim's strong Mini Snips (micro serrated 5" scissors).
I added a bit of colour with the Distress Crayons, then blended the waxy colour into the wood using my finger (no water).
I wanted shiny 3D pencils, so gave each a coating of Ranger's Glossy Accents then left them to dry somewhere flat and level.

Of course the second I put them down, I forgot they were on my book and put something down on top of them! whoops. Didn't matter, they still dried shiny :)

Once completely dry (ie, the next day in case I dented them again), I glued my new pencils and vintage paint brush using gel matte medium. They needed a hand to stay put, so I held them in place with pots of paint.
Had to leave that for a while cos each time I tried to do something else, I moved the brush.

Heat Embossing with Mixed Media...

I much prefer using embossing powders for abstract art and creating raised layers. Its certainly much easier than how they're used in cardmaking and scrapbooking. Plus, if you get spatters, it doesn't matter!

Embossing the Alphabet :
1 ... Apply some embossing ink, glue, paint or gel medium to your die cut shape (I smoothed out the squiggles with my finger but for something different, they could be left as they landed).

heat embossing elements for the Mixed Media artwork by Jenny James featuring the theme Bucket List
Ranger have a fantastic ink called "Emboss-It" Embossing Ink and its available not only as an inkpad, reinker and set of pens but also as a dabber bottle! Perfect for mixed media and abstract artwork :)

If using glue or gel medium, the powder does seem to melt better if left to dry but its not absolutely necessary.
heat embossing elements for the Mixed Media artwork by Jenny James featuring the theme Bucket List
2 ... Fold a sheet of dry paper in half and unfold, pour on some embossing powder. At the end, the crease in the paper helps guide the excess back into the jar.

heat embossing elements for the Mixed Media artwork by Jenny James featuring the theme Bucket List
3 ... Dip your sticky shape into the powder. I jostled it around a tiny bit and lifted and patted it into the powder, making sure a really thick amount was stuck.

4 ... Pour the excess powder back in its jar and repeat the process with the next colour.

heat embossing elements for the Mixed Media artwork by Jenny James featuring the theme Bucket List
5 ... Once you've got all your letters / shapes dry and ready to melt gather them onto a heat-proof surface. Using your heat tool (also called a hot air gun - not a hair dryer, its too blowy and not hot enough), gently hover over the powdered piece until the colours melt and blend. Be careful, it gets really really hot!

... slightly off topic : Did you know that next year, 2020, is the Year of the Rat? Australia Post's stamps and coins featuring native Aussie mice as well as rats are so adorable!

heat embossing elements for the Mixed Media artwork by Jenny James featuring the theme Bucket List
Careful not to get the hot air too close or stay in one spot too long as it might scorch the paper - but then, charcoal is a nice colour too!
You will need to use something like long tweezers or pliers to hold the piece as you're heating it, so you don't burn your fingers. Let everything go cool before handling!

Embossing Maisie's Boots :
Maisie's boots were created in the same way as the alphabet with only a slight difference.
I painted the gel medium directly to the page and poured on some of Ranger's Speckles Embossing Powder, pink for the boots, yellow for the trim - at the same time.

I then lifted the page to gently shake the excess powder back onto the folded sheet of paper and put back in the pink jar (there wasn't much yellow so all went back in the same jar).

When cardmaking, it helps to warm the paper from underneath to get an even coverage and help stop the heat tool from blowing around the powder over the rest of the surface.

heat embossing boots for the Mixed Media artwork by Jenny James featuring the theme Bucket List
This is how I heated Maisie's boots... firstly from underneath then over the top, waving in a way that any stray powders would be blown onto the boot and not all over the page.

painting the scenery for the Mixed Media artwork by Jenny James featuring the theme Bucket List
I always get splatters of embossing when working directly onto a surface anyway but with mixed media, its easily fixed. I painted over the unwanted spots using Dylusions paint in Mushy Peas and Dirty Martini (both are beautiful greens) to create a carpet of green ground.

Additional Elements...

adding other elements Mixed Media artwork by Jenny James featuring the theme Bucket List
While the ground was drying I added some words of wisdom around the page and one of Tim's Idea-Ology Transparent Wings (a gorgeous butterfly) in Maisie's hair.

All the sayings were stamped onto plain paper using Tim Holtz rubber stamps "Theories" and Jet Black Ranger Archival Ink Pad. The words "to do" and "important" are stickers from Dylusions Dyary collection and the "Create Art" banner is a Tim Holtz Idea-Ology Quote Chip embellishment. All glued in place using Dylusions Glue Stick and for the butterfly, double sided clear tape.

adding other elements Mixed Media artwork by Jenny James featuring the theme Bucket List
The flowers are hand painted with a paintbrush after using Tim's Idea-Ology Foam Stamps "Funky Flora" to create a guide. Using stamps to for the initial placement of flowers helps me stop overthinking where I want them to grow.
All the spots and dots and splatters are from the ends of my brushes and tools being dipped into paint. I've used Dylusions White Linen, Lemon Zest and Pure Sunshine.

finished mixed media artwork by Jenny James featuring stencilling, heat embossing, painting and collage.
I forgot to mention all the words "art" - some are stickers, some are painted with white paint, some are stamped with Tim's foam alphabet stamps (and paint), and the arrow is a Dylusions sticker too.
Add whatever words you want to say and make it your own.

I'm always around if you need a hand or have questions! Enjoy every creative moment.

Have a happy creative day!
:)
Jenny

Sunday, May 26, 2019

Dreamer of Dreams Art Journal Page

This art journal page was created inside a friend's book (as part of a swap for the Australian Art Journal Swap group) using the theme, All About Me. So I've "painted" a beautiful garden of daisies, I've used Dylusions Acrylic Paint with various stencils and my favourite colour, green.


Arty Treasures used ...

- Dylusions Acrylic Paint
... Dirty Martini, Cut Grass, Lemon Zest, Pure Sunshine, White Linen, Slate Grey, Black Marble
- Dylusions Stencils
... Squares, Flossie (you could use Maisie, Martha, Ben or any other mask), Its Raining Cats, Keyholes, Spring Bloom (large and small)
- Tim Holtz Stencils
... Organic
- Darkroom Door Stencils
... Wildflowers (large)
- Finnabair Paint Brushes
- Ranger's Mini Ink Blending Tools and Foams
- Tim Holtz Idea-Ology Embellishments
... Snarky Stickers, Chipboard Quotes, Metallic Quotations
- Dylusions Glue Stick
- Washi Tape or Purple Painters' Tape

All available at the 'Art by Jenny' online shop

The Background...

the blank slate for Jenny's garden of daisies art journal page step-by-step tutorial
Sometimes its useful to see exactly how a page begins so I've included a photo showing you the blank slate.
The colourful border around the paper is scrap paper that I've put underneath, protecting the other pages in my friend's book. I've also placed a strip of book tape (its like translucent washi tape) along the spine. This gives a smoother surface and helps stop paint from leaking into the spine.

Before you get started, gather your favourite colour paint for the background with the other main colours. Aside from look fabulous on the table, its useful to have the colours you're using nearby. Also gather all the tools you need so you don't have to go searching later. The stencils I gather while waiting for paint to dry as often, what I want to use changes with my mood or ideas that fly around my brain!

layering acrylic paint on Jenny's garden of daisies art journal page step-by-step tutorial
Using a paint brush or ink blending foam tool, paint or blend (also called smoosh) Dylusions Acrylic Paint diagonally across the page... I started off with Dirty Martini (earthy green), then on the rest of the page, Cut Grass (bright green). I worked in circles but it doesn't matter what it looks like at this stage, you're just creating a base coat.

Important : Dylusions Acrylic Paint Housekeeping ... don't forget to put the lids on your jars of paint so the moisture doesn't evaporate while you work. When you've finished for the day, spray clean water into each colour (1 or 2 pumps will do), put the lid back on and give it a little shake. This puts back any moisture that escaped when you weren't looking, ensuring the paint is beautifully smooth and creamy for next time.

layering acrylic paint on Jenny's garden of daisies art journal page step-by-step tutorial
Add another colour of paint over the page lightly (so not covering every inch) using a sea sponge, blending tool, texture tools or roller to create subtle texture. I've used Polished Jade with a coarse synthetic sponge roller.
The next step is to wait for the paint to dry. Sometimes the hardest thing to do!

how to use masks and stencils on Jenny's garden of daisies art journal page step-by-step tutorial

Once dry, attach a temporary tape to the back of a mask or stencil and place on the page. This mask keeps an area of the page in its original colour. I missed a photo at this point, but you can see the mask of a girl underneath the squares above :)

This mask is named 'Flossie', a silhouette of a girl by Dyan Reaveley. Dyan's current designs are Jay, Ellie, Ben, Maureen, Martha and Maisie. Each set has both the inner and outer (positive and negative) of each character in various sizes. I've used the middle child :)

how to use washi tape on stencils for Jenny's garden of daisies art journal page step-by-step tutorial
To make a double sided tape from single sided tape... Wrap the temporary tape in a loop with the sticky side out, place on the mask and press lightly onto the surface, just enough for the mask not to move.
Also, if you're worried the tape is too sticky, simply press it down onto a piece of fabric (not a fluffy piece!) and lift off again. Depending on your tape, it may need doing a couple of times.

This is a great way to hold stencils and masks that don't have enough room for fingers, if you have limited mobility, or want to add multiple layers without it moving, like we are here.

If I didn't tape Flossie down, she'd end up leaving paint marks every time she was nudged. Not that it would be the end of the world as you could fix that by saying its just how its mean to be or doodling around the image after it was dry :)

The easiest way to get started it to begin... I sound like Mary Poppins or Maria from Sound of Music! lol :)

creating a background for Jenny's garden of daisies art journal page step-by-step tutorial
Anyway, I began by blending Dylusions Lemon Zest paint through the Dylusions large stencils, Squares and Its Raining Cats. I've used a clean foam on my Mini Ink Blending Tool to keep the yellow fresh.
To choose stencils, use those that either compliment your theme or simply make you smile!

creating a background for Jenny's garden of daisies art journal page step-by-step tutorial
Next add a large simple design in a contrasting or shadow colour (I used Dylusions Slate Grey). This is the Darkroom Door large stencil, Wildflowers. Can you see Flossie?

creating a background for Jenny's garden of daisies art journal page step-by-step tutorial
Shown above is the background drying while I was deciding which other stencils to use... I chose the Dylusions small Keyholes and Tim Holtz Layering Stencil called Organic. They were added wherever there was a large gap between the squares and cats, using the Lemon Zest and again, the ink blending tool.

Just a quick note : I grew up using stencils with a stencil brush. Its a bristly rough round, flat ended brush that always ended up pushing paint under a stencil. It wasn't the brush's fault as I do use a fair bit of paint when I work but since discovering these marvellous round foams, it hardly ever happens. The bristly brushes are now only used when I want to stipple, create spotty patterns or add splatters.

The next step of adding all the white flowers needs to be done after everything is dry so the white paint doesn't blend into the other colours.

The Daisies...

Daisies are my most favourite flower ... all kinds including Gazanias, Sunflowers, Marigolds, Gerberas, Chrysanthemums, Dandelions - they're all such friendly flowers.

using stencils to make flowers on Jenny's garden of daisies art journal page step-by-step tutorial
All the daisies were added using both the large and small Dylusions stencils called "Spring Bloom". First the larger ones then the smaller ones to fill holes or grow the garden higher. I've used Dylusions White Linen acrylic paint and an ink blending tool (a clean foam as its white!).

After one coat of paint, it dries to a semi-translucent finish. Leave them to dry.

painting flowers on Jenny's garden of daisies art journal page step-by-step tutorial
Once dried, painted all the larger flowers and some of the smaller ones with a small round paintbrush (round no.4), again using White Linen. Leave some unpainted so they appear to be further away.

overview of flowers on Jenny's garden of daisies art journal page step-by-step tutorial
Adding white spots everywhere gave the garden a whimsical look. Hold the paintbrush vertical and simply dot the surface using a different pressure for different sized dots.

closeup of flowers on Jenny's garden of daisies art journal page step-by-step tutorial
The centres of all the daisies were created in the same manner using Dylusions Slate Grey acrylic paint and the same paintbrush.
Starting off a flower centre with a neutral colour helps guide the size and shading. It can easily be painted over with another colour, whether lighter or darker if you want to change their spots.

closeup of flowers on Jenny's garden of daisies art journal page step-by-step tutorial
So that the flower spots don't blend together and remain as little round spots, wait for each colour to dry. Don't worry if your spots aren't perfectly circular... some spots will appear squashed while others look like round speckles... just go with it. There are no mistakes in art!

closeup of flowers on Jenny's garden of daisies art journal page step-by-step tutorial
The spots for the centres were painted in this colour order... Slate Grey, Pure Sunshine, Lemon Zest, White Linen and lastly, Black Marble.
Keeping the black to just around the bottom area of each centre while the white spots are towards the top left of each centre, helps give an impression that its a raised rounded shape.

lifting the mask off Jenny's garden of daisies art journal page step-by-step tutorial
Carefully lift off your mask. Don't forget to wash the paint off before it sets but don't panic because you can always use a mild soap with a soft nailbrush to wash these stencils as they're a durable plastic :)

Jenny's garden of daisies art journal page step-by-step tutorial
To emphasize Flossie's shape that was left behind from the mask, paint a wash of black to add shadows on the inner edge of the shape. Just like the flower centres, this gives the eyes an idea that the shape might be rounded.

You can create a wash with 5 parts matte medium with 1 part paint (use gloss medium if your paint dries shiny).
Or if you're not fussed about exact quantities ... simply use a paintbrush to put a spot of paint on a palette or craft mat, then add matte medium until its a puddle of very translucent black paint. It will look watery as if there's not much black in it at all.

Use the small round paintbrush to blend around the inner edges of one side of the marks (I've chosen the right hand side, as if the light is from the top left).

Quick note on shadows ... Unless you're a movie star where light comes from all kinds of directions so there are no shadows, lighting is usually from one direction. I usually always end up creating shadows that appear as if the light is from the top left corner of a page. One day I'll mix it up and move the sun so I can have the shadows somewhere else! lol :)

Other ways of adding shadows are to use markers, pencils, crayons, watercolour markers or watersoluble crayons. Make sure you wait 12-24 hours before using pencils and markers. The paint needs to be completely cured so the pencils don't tear the paper and the markers don't get blocked.

The main thing about shadows is to ensure its not a solid coverage of black. That it allows the colours to show through, softly blending into the rest of the shape. If you look at most shadows, you'll see most have soft fuzzy edges - unless its a very bright light.

Adding Thoughts...

finished artwork of Jenny's garden of daisies art journal page step-by-step tutorial
To finish off the page with some thoughts, why not use stamps, your own handwriting or stickers?

I used a mixture of words from Tim Holtz Snarky Stickers, Chipboard Quotes and Metallic Quotations.
I've applied Dylusions Glue Stick to them all, even the stickers, so they're there forever!

So this is me... Dreamer of dreams, feeling free to fly while creating art from the heart in my happy place! The little frog in the corner is a sticker too, making this page about me complete (I love frogs!).

Tim's Snarky quote in the top left hand corner says "We never really grow up, we only learn how to act in public." - who says we have to grow up anyway? lol :D

Thanks so much for reading and checking out my journal page. I hope it makes you smile and encourages you to have a go. I'm here if you need help anytime :) Have fun!

Have a wonderful, happy creative day!
:)
Jenny

Thursday, February 14, 2019

Pretty in Pink, Purple and Gold

wise words on the art journal page by Jenny James - golden hearts with pink and purple
Listen to your heart, use your wings, always believe, remember me ... Adding thoughts to an art journal page finishes it off, whether its a simple phrase or the novella of your life. 

There are endless ways to add messages, words and quotes to artwork too... stamps, die cut letters, stickers, quote strips, tags and tokens, stencils, drawing it freehand, printing from the computer, writing in a beautiful script (maybe with a quill) or scribbling in a scrawl only you can read. Its your artwork, so dream up whatever you want to say, then write, draw, stamp, cut out, print or stick it down!

This pretty pink, purple and golden art journal page was created during one of my 'Something on Saturday' workshops. Art journal pages are a great way to learn techniques, they're like an art and craft sampler! I didn't take alot of photos this time, but it should still give you an idea on how to recreate the page at home.

List of arty treasures used ...

Dylusions Mixed Media Art Journals
Dylusions Acrylic Paint (link is to all colours)
... Bubblegum Pink, White Linen
Dylusions Ink Spray (link is to all colours)
... White Linen
- Finnabair Art Alchemy Metallique paints (link is to all colours)
... White Pearl, Antique Coin (gold)
- Finnabair Art Alchemy Sparks paints (link is to all colours)
... Iris Potion (purple)
- Stencils by Tim Holtz, Finnabair and Darkroom Door (click here for all stencils)
- Finnabair 3D Gloss Gel (translucent glossy gel medium that dries shiny, clear and raised)
Dylusions Mini Collage Glue Stick
- Tim Holtz Plastic Spatula (click here for all spatulas)
Paint Brushes (link is to all paint brushes)
Tim Holtz Thinlits - Die Cutting Set by Sizzix - Scribbles and Splat
Tim Holtz Distress Sprayer Bottle
- Ranger Ink Blending Tools (click here for all blending tools)
- Tim Holtz Stickers (link to all Tim's stickers)
- Tim Holtz Idea-Ology Chipboard Quote Chips
- Ranger Liquid Pearls (available to order anytime)
- Ranger Stickles Glitter Glue (available to order anytime)

Shop online at www.shop.artbyjenny.com.au

Instructions ...

After gathering all your hearts, golds and favourite stencils together, put them to one side and pick up your foam blender or Ranger Ink Blending Tool.
Working in small circles, use it to blend Dylusions Acrylic Paint in Bubblegum Pink with White Linen over your whole page (mine is a double page spread in a small journal).
Add a few rounds or circles of Finnabair Metallique Pearl White Acrylic Paint over the top.
You're aiming for the appearance of fluffy clouds, not a solid coverage.

paints used for the art journal page by Jenny James - golden hearts with pink and purple
To use the Ink Blending Tool with paint, add a spot of paint to your craft mat and roll the blender around in the paint, working some of it into the foam.
The above picture shows the Finnabair Metallique Pearl White being added into the rough mix of Dylusions Bubblegum Pink and White Linen (with the pure Bubblegum Pink underneath). The Pearl White adds a hint of shimmer to the pinks.

Make sure to keep your lids on any paint pots when not using them so they don't lose moisture. Don't forget that when you're finished for the day, add a mist of water into each jar to put back what may have evaporated (especially if its a warm day).

beginning of the art journal page by Jenny James - golden hearts with pink and purple
I didn't take as many photos as I usually do, but I'm pretty sure you can imagine a whole page of pink fluffy clouds that shimmer in the sunlight...
The above closeup photo is showing how it looks after adding the initial stencil designs. First, the Bubblegum Pink was blending through the large Darkroom Door Wildflowers stencil, then I used White Linen (with the same blending tool so it was more like a very pale pink) through the Tim Holtz Ornate and Dylusions Love Hearts (small) stencils.

background of art journal page by Jenny James - golden hearts with pink and purple
Alternating between pink and white, I blended more layers of stencil designs using Dylusions Arrows (small) and Tim Holtz Tinsel, Bubbles and Code.
Afterwards, using the large Darkroom Door Wildflower stencil again, I repainted the flowerheads with the darker pink.

closeup photo of art journal page by Jenny James - golden hearts with pink and purple
With the Finnabair Sparks Iris Potion Acrylic Paint and the Tim Holtz Layering Stencil, Flourish, add beautiful swirls of purple to parts of your page (shown above, on the right).

The spots of purple and gold to the left in the above photo were created using a custom texture paste. Use an equal amount of gel 3D gloss medium and Finnabair Metallique Iris Potion (purple) acrylic paint. Mix together with a spatula on your craft mat or palette. Blend this through the Tim Holtz Layering Stencil, Bubbles with the spatula (shown on the right after gold leaf has been added).

Flip the stencil over and press onto your page to print the reverse image of the bubbles. This gives a great effect while also uses the excess purple paint left on the stencil.

closeup photo of art journal page by Jenny James - golden hearts with pink and purple

How to Make a Golden Scribbly Heart...
Cut the heart shape out of cardstock using the Tim Holtz Thinlits Scribbles and Splat Die Cutting Set by Sizzix. I used a silver cardstock in case some of the gold leaf didn't stick!
Apply glue to the whole surface of the heart and layer on the gold leaf sheet or flakes. Press it into all parts of the heart using a large soft paintbrush. Leave it to dry.

Once the heart is completely dry, hold it in your hand and gently brush away the loose gold. Use your fingers to gently smooth off any edges and buff the surface.

If you clean off the Scribbly Heart over the top of your artwork, then the leftover gold leaf that falls onto your page will adhere to any parts of the page that isn't dry. Texture paste may take a while to dry so you've plenty of time to work.

art journal page by Jenny James - golden hearts with pink and purple
Using Finnabair Metallique Antique Coin Acrylic Paint and the Finnabair Stencil, Manuscript, add golden areas of text to your page. Its just to add an extra bit of interest and break up the pink!

For a dramatic effect, spray or splatter Dylusions Ink Spray in White Linen over the page. Ideally, this should be done before you stick on the Scribbly Heart as it will save you masking it off to keep it free of white spots.

Adhere your Golden Scribbly Heart to your page using adhesive, matte medium or a gluestick.

The little hearts and spots of gold are created by hand using Ranger Liquid Pearls (gold dimensional pearlescent paint), Ranger Stickles (gold glitter glue) and Finnabair Metallique Antique Coin Acrylic Paint.

Finished art journal page by Jenny James - golden hearts with pink and purple
To complete the page, I've glued on phrases from the Tim Holtz sticker collection and Idea-Ology Chipboard Quote Chips.

Have fun creating this pretty in pink page! If you need a hand, I'm here to help.

Happy Creative Day!
:)
Jenny


Saturday, December 30, 2017

Perfectly Happy Cast of Characters

A flock of galahs are the feature of my journal page for Janie's beautiful book of Simply Whimsical. Janie loves animals as much as I do, so I know she'll like these guys :) This journal is visiting from Cairns, Queensland as part of a swap with the Australian Art Swap Group. A fantastic group of artists, all with one thing in common... an enthusiastic passion for all things colourful, creative, arty and fun! Its awesome - click here to visit the Facebook group.

Galahs made using Tim Holtz Bird Crazy Stamps

I used Dyan Reaveley's Dylusions acrylic paints in Mushy Peas (green), Vanilla Custard (yellow), Slate Grey and White Linen along with stencils by Tim Holtz and Dina Wakley, Tim's stamps, Sizzix die templates (using the Sidekick), Dina Wakley's Art Sticks, Jane Davenport's Mermaid Markers, Tim's Idea-Ology Botanical Layers and We R Memory Keepers' Stitch Happy Silver Thread.

picture of stencils used to create the artwork with galahs

My initial idea was to have a couple of magpies made using the Crazy Birds with a nest featuring a newly hatched nutty adorable bird with paint brushes and pencils (see the scribble in the pic above)... but it soon turned into something completely different!

Whimsey is all about being funny, adorable and simple - so I tried to stick to limited colours and design for the background. You can see below that I was on my way to creating that page with the nest.

List of treasures used to make the artwork...

- Dylusions Acrylic Paint (Mushy Peas, Vanilla Custard, Slate Grey, White Linen)
- Ink Blending Tool
- Stencils by Tim Holtz and Dina Wakley (link to all stencils)
- Tim Holtz Crazy Things Stamps
- Tim Holtz Bird Crazy Stamps
- Tim Holtz Bird Crazy Thinlits (die cutters)
- Tim Holtz Sidekick
- Archival Ink Pad (grey and red)
- Dina Wakley Art Sticks
- Jane Davenport Mermaid Markers
- Waterbrush
- Tim Holtz Clippings Stickers
- Tim Holtz Metallic Holiday Talk (stickers)
- WRMK Stitch Happy Silver Thread
- Tim Holtz Botanical Layers (die cut pieces)
- Tim Snips (micro serrated scissors)
- Tim Holtz Splatter Paint Brush
- Ranger Glue Stick
- Glossy Accents
... everything can be found here - www.shop.artbyjenny.com.au
... this is a link to all the treasures in one collection


picture of the background before the birds were added

How I created the background...

Using a wet wipe, I smooshed Vanilla Custard Dylusions Paint over a large part of the background. I then used the same wet wipe to paint Mushy Peas Dylusions Paint in the spaces left behind and overlapped a few areas. It was looking more yellow than green but that's ok :)

Using an ink blending tool (with the round foams), I stencilled through Dina's Jungle stencil across the top of the page with the Mushy Peas. I then introduced Slate Grey with Tim's Scribbles stencil by along the bottom and top left corner.

I mixed the grey and green together on my craft mat and stencilled through Dina's Leaves stencil and then Tim's Leafy (which is similar to Dina's but smaller leaf design). Each time I picked up more paint, I alternated between the green and grey-green mix.

painting backgrounds using Dylusions paint and stencils

Next was the branch created using Tim's Birch stencil, first with the green-grey mix then twice more just the grey. Eventually it started looking like an actual tree branch.
The little branches were stencilled with Tim's Autumn stencil, flipped and flopped to get the different branch directions.

The same stencil was used with Mushy Peas to add big maple leaves here and there on the page... galahs don't live in maple trees but they don't seem to mind!

Lastly, I splattered pale green paint (white with a touch of green) and then white paint over the page using a Tim Holtz Splatter Brush.

stamping Galahs made using Tim Holtz Bird Crazy Stamps

How I created the galahs...

The background dried pretty fast but I put it aside for a while anyway, while I stamped and coloured the birds. Galahs are grey and pink with hints of white so I've stamped them all using Watering Can (grey) Archival Ink. The Red Carnation Archival Ink was used to stamp out sunnies, brushes, hats and ties.

colouring galahs with Dina Wakley watercolour art sticks

Colouring these fun Aussie birds wasn't difficult but it took a couple to get them pink rather than bright pink or rosy red... I ended up using Dina's Paint Sticks in Fuchsia, White and Black for the feathers and Jane's Mermaid Markers in Sand Bar and Beach for the beaks.

trimming and cutting Galahs made using Tim Holtz Bird Crazy Stamps

I started cutting them all out using scissors (Tim's fab micro serrated snips are great for tiny details like wings and feet), then decided to use the Sidekick. That was much faster! And it cut around all the little tufts of head feathers, tails and feet easily too :)

placement for the Galahs made using Tim Holtz Bird Crazy Stamps

Before I glued everything down, I played around with different Botanical Layer die-cut pieces and placement of the Stitch Happy silver thread. Each wire across the page is a twist of 3 threads, glued down with Glossy Accents.

Galahs are such fun Australian birds ... they love to swing, jump and laugh together on electric wires, tree branches and telephone cables.

Galahs made using Tim Holtz Bird Crazy Stamps

After all the birds were attached, I decided to use the bowler hat, bow tie and sunnies after all. I had put them aside for a while, unsure of where my page was going.
All the eyes were redrawn using black Dylusions paint pen with the highlight dotted with white Dylusions paint pen.

Galahs made using Tim Holtz Bird Crazy Stamps

Tim's salvaged thoughts and sayings are perfect for journal pages. I've used 2 sets - the Clippings Stickers and Metallic Christmas Stickers to say "listen to the laughter, contented spirit, perfectly happy cast of characters, let the merrymaking begin".

Thanks so much for visiting my craft blog. Sing out if you have questions or need a hand :) I'm here to help anytime.

Happy Creative Day!
:)
Jenny