Sunday, December 25, 2022

How to Create a Fun Christmas Collage

Merry Christmas!

Its that fab time of year when we add elves and holly to almost anything. This mixed media artwork was created using the adorable Dyan Reaveley stamps, Dylusions Ink Sprays, Tim's gorgeous Collage Paper and a few other supplies. I hope it inspires you to have a go and enjoy the fun process of smooshing paint and colouring stamps!


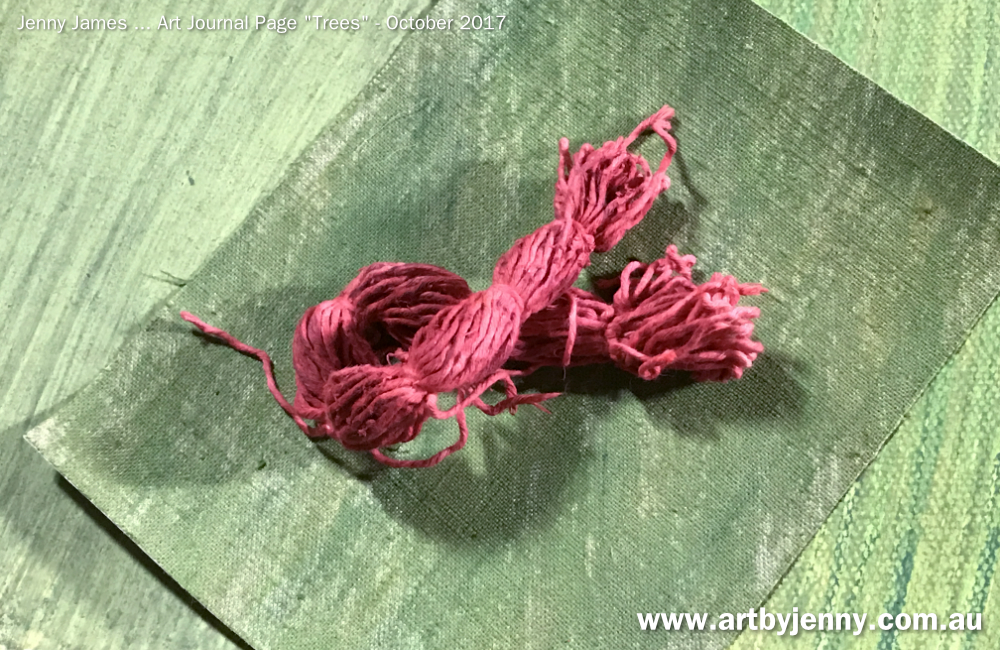
The colours were inspired by this beautiful bucketful of Geraldton Wax my Dad placed at my door after he pruned our tree.

List of treasures used ...

Strathmore Paper Pad - Mixed Media - Series 400 - 9x12
Dylusions Mixed Media Cardstock
- Tim Holtz Idea-Ology Collage Paper "Forest"
- Dylusions Acrylic Paint (link is to all colours)
- Dylusions Ink Sprays (link is to all colours)
- Finnabair Metallique Antique Coin (tap here for all Art Alchemy Metallique paints)
- Dylusions Stamps "Kiss Me Under the Mistletoe" and "Elf Improvement Class"
Tim Holtz Idea-Ology Cling Foam Stamps - Christmas Ornaments
- Stencils by Dylusions, Tim Holtz and Studio Light (click here for all stencils)
- Jane Davenport Cave Black Squid Ink (or use Ranger Jet Black Archival Ink)
- Dylusions Paint Pens (black and white)
Kuretake Hikkei Black Double Ended Brush Pen
- Finnabair Extravagance Paper Texture Paste
Ranger Multi Medium Matte
Dylusions by Dyan Reaveley Mini Collage Glue Stick
Tim Holtz Non-Stick Mini Snips
- Tim Holtz Plastic Spatula (click here for all spatulas)
Tim Holtz Distress Splatter Paint Brush
- Paint Brushes (link is to all paint brushes)
Tim Holtz Distress Sprayer Bottle
- Ranger Ink Blending Tools (click here for all blending tools)
- Acrylic Stamping Blocks

Shop online at www.shop.artbyjenny.com.au

Instructions ...

The first thing I did was blend Dylusions Bubblegum Pink Acrylic Paint over the whole of my page using my trusty Ranger Ink Blending Tool. Using the same blending tool, I picked up a speck the Dylusions White Linen Acrylic Paint (I'd put a portion of each colour the size of a 20 cent piece on my craft mat). The white was used to blend over the top right and bottom left of the page, making it a fraction lighter.

The next step was adding some interest into the background... using the small Dylusions Squares Stencil and with the white still on the blending tool, I added patches of squares (see below).

Dylusions Paint dries quite fast on a warm day so remembering to put lids back on straight away is important. When finished for the day, I always open up the jars I've used and add a mist or two of water and give it a light shake. This helps stop the paint from thickening as the jar empties (from use!).

Its pretty rare that I'll only use 1 or 2 stencils on a background... I usually choose designs to match my thoughts or the theme of what I'm creating. At this point I wasn't quite sure where I was headed, so adding the Dylusions Arrows was a perfect replica of my thoughts - all over the place! lol :)
They've been layered onto the page using Bubblegum Pink.

Above is a quick overview of the page so far. Here I've added Dylusions Pomegrannate Acrylic Paint through a Studio Light Flower Stencil.

The flower stencil was flipped to add the third flower then Dylusions Honeycomb, Keyholes and Hearts were layered onto the page with Bubblegum Pink and White Linen paint.

Shapes of baubles from the Tim Holtz Idea-Ology "Christmas" Foam Stamps were then printed across the top of the page using Dylusions White Linen Paint.
The above photo shows how : by placing the foam stamp on an acrylic block, applying paint with a foam ink blending tool and pressing to print.

Once all the paint was dry, I stamped on the Santa sleigh from the Dylusions set, "Elf Impovement Class" using a black inkpad. I then coloured over it using a black paint pen to make it stand out even more from the page.

I've pasted two pieces of Tim Holtz Collage Tissue Paper onto the page using a matte medium gel (adhesives like Mod Podge or Ranger's Glue 'n Seal will also work) and a wide flat paintbrush. The piece on the right hand side has been torn and pieced back to work around the sleigh.

How to add a layer of tissue... brush the matte medium gel or glue onto a small section of the page. Place the tissue paper onto this section and smooth it down using the same brush. Lift the unglued section carefully and apply medium underneath, smoothing it down with the brush as you go.

This technique makes it easier to line up the tissue paper without it getting stuck where its not wanted. The smaller section then holds the paper in place while you glue the rest of it down. If you put glue over the whole page first, it might be dry before you've placed your tissue. The size of your section depends on your page size and the weather... I generally work in strips of 2-3 inches wide until the whole sheet is stuck. I also cover the whole page with more matte medium to ensure it is completely stuck! On a loose page like this one, I fold and glue the excess to the back.

White splatters of paint always seem to liven up a page. Sometimes I use the Dylusions White Linen Ink Spray or Tim's Distress Spray Stain in Picket Fence.
I still had some White Linen paint on my craft sheet so added a few sprays of water and mixed it in with the splatter brush (as shown above). I then flick paint all over the place and let it dry.

Adding areas of texture paste onto a background creates a tactile element to the page. The Ranger Translucent Gel Texture Paste is easily seen when wet and clear after its dry.

Using a spatula or palette knife (some use an old credit card), scrape the gel across and through a stencil (I've used the Tim Holtz "Poinsettia" and "Festive" Layering Stencils). Lift the stencil carefully to reveal the beautiful design.

The above photo is a closeup of the texture paste before it dried. Once dry, it is clear but remains raised.

Above is an overview of the whole page so far... waiting for all that texture paste to dry! While waiting, I coloured in my stamps.

Using the Jane Davenport Squid Ink in black, I stamped out oodles of holly leaves, mistletoe and elves. Jane's hybrid ink is both water and solvent resistant... which means you can use it with both watercolours and alcohol markers - and the stamped image didn't go blurry with either of them!

All the images were coloured with Dylusions Ink Spray... the leaves were painted using a small round brush using Fresh Lime with London Blue painted into the shadows and stems. Some had more blue than others and I left all the berries white (ie, unpainted).

The leaves were all handcut using small scissors then edged in Bubblegum Pink Ink Spray (to complment the background). A few sprigs of holly had white space left in tact which was also painted with the pink Ink Spray.

The elves' heads were painted with Dylusions Ink Sprays as well. To get their elfish skin tone, I started with a very small puddle of Bubblegum Pink on my plate (see further above) and added water (2-3 times the amount of ink) to make it alot paler. This was painted onto their faces.
I then mixed in a teeny tiny drop of green to the pink (turning it slightly brown) and used that for shadows around the neck, cheeks and ears.

The hats were painted using Cherry Pie (red) and silly me tried to paint out the spots using white paint before they dried (which is why they're so muddy!). The shadows were added using the greeny brown mix left over from the faces. The bells were different colours to see which I liked best but were only a base for underneath the gold paint.

After the muddle of the elf hats, I painted the shoes more carefully, leaving the white spots without colour... takes longer to do but a much better way to go.
Fresh Lime and Cut Grass were used for the leggings and inside of the boots.

I was hanging out to use the beautiful "Falling Stars" stencil by Tim and the very cool Finnabair Paper Texture Paste (made by Prima Marketing). I applied this thick paste through the stencil and let it dry (which didn't take long, always a bonus!). It remained white when dry with a hard, raised, 3-dimensional texture with a rough finish.

After being introduced to Ranger's Dylusions Glue Stick by Dyan, I've not used anything else (apart from Glossy Accents and various mediums). For such a little gluestick, it packs alot of punch! It dries fast, clear, permanent on porous surfaces and is non-yellowing. Being little is so handy too, as it makes it alot easier to apply glue to tiny leaves and skinny stems.

Almost finished... I cleaned up the elves' hats and fixed up Santa's sleigh using the Dylusions Paint Pens and Kuretake pen. The cat on Santa's sleight got given whiskers and a longer tail.

Closeup photo showing how the legs were pieced together for the two elves carrying the Christmas trees. The pair of legs on the left were cut apart and put back together to appear as if they're walking or taking a step. Each shoe has a spot of gold acrylic paint for the bell.

Not all characters need a body! Simply make them look like they're carrying something (like a tree) or hiding behind something else. Create the illusion of a body by showing just the head and feet, the eyes will do the rest :)

The elf on the right hand side of the page has tripped over a tiny leaf of holly and dropped his tree. Adding another leaf over the top of the thigh hides the lack of body as well :)

All finished :) Click to view larger!

I hope this helps and inspires you to get creative with your layering. Don't forget to allow some layers to dry before adding more. I'm here if you need a hand :) Have fun!

Happy Creative Day!
:)
Jenny

Saturday, April 30, 2022

Art Journal Page - Bonsai Flowering River Red Gum

This art journal page was dreamed up and created in 2017 as part of an art journal swap around Australia. Its been updated to reflect product changes (as some have retired) with new thoughts and better way of saying things so its easier to understand. I took alot of photos along the way too - only 152! lol :) I still take dozens sometimes hundreds of photos while creating! Its handy sometimes to have a reminder of how something was made! Hope it makes you smile :) Enjoy!

Learning to Fly ... art journal page by Jenny James using stickers from Tim Holtz

How to Grow a Flowering River Red Gum in a Book

Louise's book is incredible! I love it. When I first saw her theme as part of the Australian Art Journal Swap, I was going to paint or draw something like one of those abstract modern trees with all the curly branches, then I thought of that night / day painting I love... then the book arrived! Wow :D Scrapped all those initial thoughts because it simply had to be a page that was worthy of Louise and her beautiful book. I decided upon a flowering Red Gum. But of course they're tall and strong and huge ... this book is a wide landscape. When searching for pics of trees I came across bonsai trees, why didn't I think of that before? So a Bonsai Red Gum was grown inside the book using a few of my favourite things.

I love stencils :) There are literally thousands of them out there plus the blank sheets of plastic (packaging, paper, card, scraps ... anything can be a stencil or mask). I seem to have collected a few over the years! lol For this page I've used stencils by Tim Holtz and Darkroom Door's Wildflower (small clean one on the right, its not clean anymore).

The page started out being a whole background of Tim Holtz Collage Tissue (Melange, retired). It was covered with music and butterflies, you could also use one called "Entomology" which is beautiful or use birds from the roll of "Aviary" Collage Tissue. 
Trusting the mess is really hard. The colours weren't what I wanted, the stencils didn't look like a forest of wildflowers... but "trust the mess" we're always told. Its just a background...!

How pretty and delicate are these die cut wildflowers (made using a set of Tim Holtz Sizzix Thinlits). They've been die cut using sets 1 and 2 of "Wildflowers" with my Cuttlebug. The flowers on the left are handmade ricepaper and the others are made of kraft cardboard.

Layer upon layer the picture started looking like a tree with a garden. The tree was painted (planted! lol) using a mixture of watercolours and pencils. All the browns turned grey and the reds looked too red and out of place. Trust the mess... who invented that phrase anyway? How did they know to trust it when the art just doesn't look how you want it to look? Breathe... what will be will be :)

All the wildflowers were glued in place using gel medium. At least they seemed to calm down the mess. It needed to dry so gave up looking at it and went onto making the flowers and leaves.

The gum leaves were made using Tim Holtz's adhesive backed fabrics and watercolour paper.

This photo above shows the lightest piece of Tim's fabric before I misted it with water. Being an even weave lightweight linen fabric, it took well to the water and ink.

Here is the string ready to be coloured. My first idea was to paint the blossoms and just attached bits of string but that soon changed to having more string and less card!

To colour the string, I used Derwent Inktense art sticks. I used three different reds and then sprayed it with water and squished it around. I did this a few times until the string was totally soaked in red ink. I guess using a dye bath would have been better, or I could have soaked the string using Distress Stains but I just wanted to use my art sticks! They're so cool :)

I love string! Dying the string with the Inktense art sticks coloured the card at the same time. I had such a lovely time :)

Love the red in this photo! Such a beautiful colour, one of my favourites :) This photo is only here because of that! lol :) Gotta love colour!

Almost dry... string, card and fabric ready to get turned into flowering red gum blossoms.

Luckily it was windy when I hung out the string to dry so I was able to make the flowers the next day (instead of waiting till later). So grateful for my Tim Snips because their micro-serated blades cut the string bulk alot easier than my other craft scissors.

A bit of yellow Enamel Accents (3D paint) was spotted delicately on the printouts and smooshed everywhere on the ends of the string flowers.

All the gum leaves were handcut ("fussy" cut... not that I was too fussy!). Some are a better shape than others, but I do love how the colours have behaved and dried the proper gum leaf green.

Pegs are the best invention!

This is a closeup of the leaves and gum blossoms. The veins were drawn with red pencil. It always amazes me how things change after they've dried and been put together! So pleased with how these flowers have turned out :)

These adorable little birds and leaves were made by my Dad (handcut between pieces of craftwood on his scrollsaw).

I used watercolours to paint the birds... it soaked in a bit but once they dried, they looked fine. These are a new species of bird - a spoggiestar! Spoggy is sparrow, star from starling... not that they need to be real birds, its only art :)

Learning to Fly ... art journal page by Jenny James using stickers from Tim Holtz

A few Clippings Stickers by Tim Holtz (hundreds to choose from in every pack) were added to the page near the birds. I love the sayings Tim's found and collated together for his sticker packs and washi tape. I have a computer and printer with the whole internet filled with quotes and clever sayings, plus hundreds of books! But there's something awesome about stickers and I don't know what it is, I simply love stickers :)

finished page using many textiles, inks and paints

So here it is, a bonsai flowering river red gum (eucalyptus camaldulensis). Thanks to Louise for such a wonderful theme. I loved making this page :) xx Jenny

Edit ... 30 April 2022 - You may have seen this page before as I created it in October 2017 and published the tutorial originally in November 2017 at the Australian Journal Swap Blog. I've updated a bit of the wording to reflect changes in product names and availability (treasures retire to make way for new fresh ideas and products). This page still makes me smile, hope it makes you smile too and inspires you to create something arty crafty today!